Chocolate Pear Tart

crab apple blossoms

For a few days every Spring, the crab apple tree in my parents backyard blooms with the prettiest pink flowers. After a day or two, petals start showering down until there is just one little flower left. The backyard is like a little sanctuary; surrounded by trees on all one could almost think they were in the country. Almost. I like to sit out there on the weekends with a nice cup of coffee and just enjoy the weekend, it helps take the stress of the week away.

My doctor recently told me to try not to stress. Easier said than done. He also told me to cut back on caffeine. He then went on to list things that have caffeine in them; coffee, tea, soda, chocolate…

Chocolate?

I know that chocolate has caffeine in it, but the idea of taking chocolate out of my life as a way to reduce stress just seems like madness to me. So I have decided to selectively follow his advice. I don’t eat that much chocolate, but I’m not prepared to give up what I do have.

This tart wasn’t made to intentional defy the doctors orders, but he may have put the idea of chocolate into my head. I was flipping through Martha Stewart’s New Pies and Tarts, when I came across this recipe. I had all the ingredients and it looked really easy and quick to put together so I figured I’d give it a try. I was right, it was really easy to put together, but I’m not sure it could be made without a food processor. A few drops did drip out of the tart pan, so if you decide to make this placing a baking sheet on the rack below that tart.

Basically a flourless chocolate cake with pears, this tart is intensely chocolatey. The pear and chocolate were a really nice combination, and the almond rounded all the flavours out. I did find it a little too moist, I think some of the juice from the pear seeped into the tart.

Chocolate Pear Tart

Adapted very slightly from Martha Stewart

  • 1/2 cup unsalted butter at room temperature
  • 1 cup slivered almonds
  • 3/4 cups granulated sugar
  • 3 large eggs
  • 1/3 cup cocoa powder
  • 1/2 tsp salt
  • 1 tbsp almond liqueur
  • 3 firm, ripe pears
  • 2 tbsp apricot or apple jelly
  1. Preheat the oven to 350F. Grease a 9 inch tart pan, set aside.
  2. In a food processor, combine the almonds and sugar until finely ground. Add the butter, eggs, cocoa, vanilla and almond liqueur. Process until well combined. Pour into the prepared tart pan. 
  3. Peel, core and slice the pears and place them on the tart. Bake for 45 to 50 minutes, until a tester comes out clean. Heat the jelly slightly then brush on the pears. Let the tart set for 20 minutes before removing from the pan. 
Enjoy!

Oatmeal Cherry Cookies

Oatmeal Cherry Cookies

I discovered something this weekend, something I probably should have known. It turns out I can no longer stay out till 4 AM without suffering any consequences.

I was out for my friend Steph’s bachelorette party. I had a great time, and I hope she enjoyed her “last night of freedom”.

Unfortunately, even though I didn’t have much to drink, I was completely exhausted the next day. I had a busy day planned to so forced myself to get up early. The people at Eat In Eat Out Magazine have been kind enough to include I’ll Have What She’s Having in their Holiday edition. I need to submit two holiday recipes to them, so I planned to make at least one dish last weekend. But I was tired and cranky and really not in the mood for a holiday style dish.

I wanted something easy and comforting. I wanted a cookie. And a glass of milk.

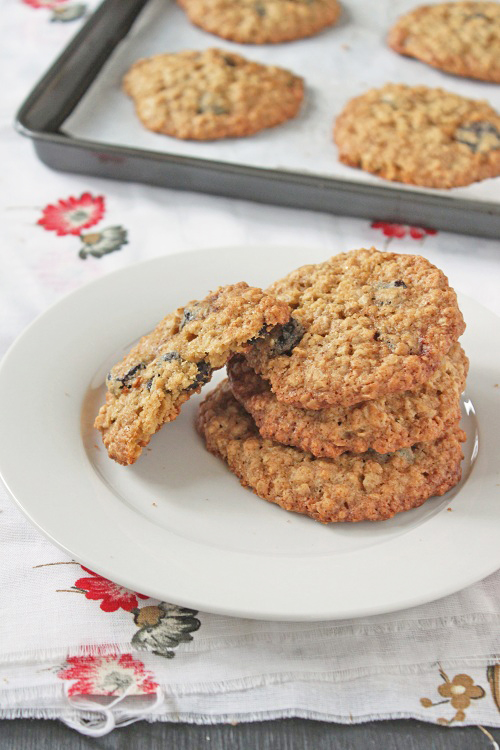
So that’s what I made. A simple oatmeal cookie, the kind of cookie that brings back memories of childhood and makes everything better. These cookies are crispy on the outside with a chewy center. The sour cherries are a great contrast to the sweet cookie, and the cardamom adds a touch of warmth.  I had them with a glass of milk, and then I took a nice long nap.

Oatmeal Cherry Cookies

Oatmeal Cherry Cookies

  • 1 1/2 cups rolled oats
  • 1/2 cup all purpose flour
  • 1/2 cup dried sour cherries
  • 1/2 tsp baking soda
  • 1/2 tsp salt
  • 1/2 tsp cardamom
  • 6 tbsp butter
  • 1/2 cup packed brown sugar
  • 1/4 cup granulated sugar
  • 1 egg
  • 1 tsp vanilla extract
  1. Preheat the oven to 350 F
  2. In a medium bowl, stir the oats, flour, cherries, baking soda, salt and cardamom together. In a separate bowl, beat the butter and sugars together with an electric mixer until light and fluffy. Beat in the egg, followed by the vanilla. With a wooden spoon, stir in the flour mixture until well combined.
  3. Line 2 baking sheets with parchment paper. Using about a tablespoon of dough per cookie, and drop them two inches apart on the baking sheets. Bake for 12 to 16 minutes. Let cool on the baking sheets for 5 minutes then transfer to a wire rack to cool completely.
Enjoy!

Apricot Scones

If you’re interested in molecular gastronomy, you need look no further than baking. When cooking the results can be spectacular, but they almost always resemble the original ingredients; a raw steak and cooked steak both look like steak. But when baking flour, sugar, butter and eggs come together to form something that is much more than the some of its parts. I believe that the first person to mix these together and bake a cake was a genius.

Baking is about about proportions; the right combination of ingredients will lead to something magical. Each ingredient plays a part. The flour mixed with liquids form gluten that traps air bubbles and gives baked goods their texture. The sugar sweetens but it also adds air to the batter, contributes to browning and stops the gluten from getting too tough. Butter tenderizes and moistens.

I know all these things.

Yet somehow I still manage to mess things up.

On Sunday I decided to make banana bread. I’ve made banana bread so many times I no longer even look at a recipe. I mixed up all my ingredients put them in the oven and waited. And waited. And waited. The bread never rose, the top never browned. After about an hour and a half (the bread should only have taken an hour) I thought back on my steps and realized I had forgotten the sugar. I kept baking because I thought maybe the sugars in the bananas would somehow save it. They didn’t. When the bread wasn’t cooked through after two hours I gave up.

I’ve made this mistake before and I’m sure I’ll make it again. I wasn’t fazed, just upset at the wasted ingredients.

This morning I got up with the intention of making scones. I found a recipe from a reputable source and gave it a try. I tried even though the voice in my head said it was off. “There’s too much sugar, too much flour, not enough butter” the voice said; I ignored it. “The oven isn’t hot enough” she told me; I didn’t listen. I added more liquid to compensate for the dryness, popped them in the oven and waited. When they came out of the oven they were like overly sweetened hockey pucks.

Another failure. Had a I lost my baking mojo?

I couldn’t let this second failure get to me.

I went through my boxes and found the scone recipe I’ve always used in a pile of papers. As I read it knew this was right. Just enough flour; very little sugar; and a hot, hot oven. I started again.

Thankfully, my baking mojo is not lost. I needed to trust myself, that’s all.

This recipe is a little different than the typical scone recipe, in that it has eggs. This makes them a little more cakey, less biscuit like, but still a little flaky and layered. I used dried apricot in the scones, but anything could be added, raisins, nuts, chocolate chips. They can also be flavoured any way you’d like; spices, lemon zest, rose water.. the possibilities are endless!

Apricot Scones

  • 2 eggs
  • 1/2 cup milk
  • 2 cups all purpose flour
  • 2 tsp baking powder
  • 1/2 tsp salt
  • 1/4 cup sugar (plus more for sprinkling on tops)
  • 6 tbsp butter, cold and cut into cubes
  • 1 cup roughly chopped dried apricots
  1. Preheat the oven to 450 F
  2. In a small bowl whisk the eggs and milk together. Set aside.
  3. In a large bowl, sift together the flour, baking powder, salt and sugar. Add the butter to the dry ingredients, then using your fingertips rub the butter into the flour until there a few pea sized pieces of butter.
  4. Pour the milk into the flour and stir together with a fork until just combined, then stir in the dried apricots. Turn the dough out onto a floured surface and shape into a disk, about 1 inch thick. Using a round cookie cutter or a glass, cut circles of dough and place them on parchment paper lined baking sheet.
  5. Sprinkle the tops of the scones with sugar. Bake for 12 to 15 minutes until the tops are browned.
  6. Serve with your favourite jam or fruit butter.
Enjoy!

Egyptian Date Crescents

During our baking marathon last Friday my mom and I also made some cookies, including these Egyptian Date Cookies. We make them every year at Christmas and Easter for my dad. As we shaped these Egyptian cookies, my mom told me stories about what Easter was like when she was growing up in Poland. There was so much cooking and baking to do, the whole family would work for days in advance. Everyone you saw was invited to Easter dinner, and often people you hadn’t seen would just show up, so they had to be prepared for a lot of guests. On Easter Sunday no work was done. Everyone would go to church and then families and friends would all get together to celebrate.

Things are a little different now, as it was just my immediate family at our celebration this year. We still had quite a feast though. First was breakfast made up of Polish sausage and ham, rye bread, hard boiled eggs, and babka. It’s a very Polish meal. Then after a quick visit to the Saint Joseph Oratory on Mount Royal (a beautiful basilica with very challenging steps leading up to it, every time I go I hear the Rocky theme music in my head), we got to work on dinner. Roast lamb, stuffed vines leaves, rice, potatoes, salad. Then came my favourite part, dessert; a light cake and these cookies.

One of the advantages of having my mom around while baking is that I was able to take “how to” pics. Here’s a visual on how to form the crescents:

Egyptian Date Crescents

Makes about 50 cookies

  • 4 cups flour
  • 1 lb butter at room temp, cut into pieces
  • 1 tsp rose water
  • 1/2 cup milk
  • 1 package pressed dates
  • icing sugar for coating
  1. Preheat oven to 400.
  2. Using your hands, combine the butter and flour until it holds together when squeezed and there are no large pieces of butter.
  3. Add the rose water and milk. Stir until well combined. The dough should have a play dough like consistency.
  4. Take about a tablespoon of dough, form it into a ball. Press the center of the ball down, creating dent in the dough. Place a small amount of the pressed dates into the indentation. Close the dough up, then twist into a crescent. (See pictures above)
  5. Bake for 15 minutes, until the bottom of the cookies are just golden.
  6. Let cool completely, then cover in icing sugar.
These cookies will keep in an airtight container for about a week.
Enjoy!

Nutella Scones

February 5th is World Nutella Day. I may or may not have already mentioned this, but I looooove Nutella. I know it isn’t actually healthy, despite what the commercials say, but it is so delicious. Chocolate and hazelnut are just a match made in heaven.

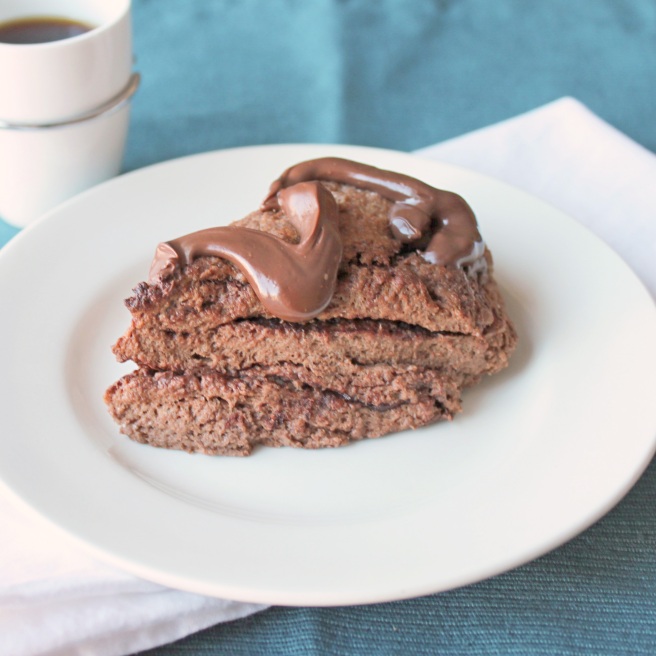
I think my favourite way to eat Nutella is slathered in a thick layer on toasted white bread. I’ve only started baking with Nutella recently. My first attempt at it was my Chocolate Nutella Bites. That was followed quickly by Abby Dodge’s Nutella Fudge Brownies. To celebrate Nutella Day, I decided to try these Nutella Scones from Baked Explorations. I’ve been eying the book since it came out, and based on how well these guys came out I think I have no choice but to buy it. The scones are incredibly addictive, I love the layers of Nutella baked between chocolate scone. If you don’t have plans for Nutella Day, make these.

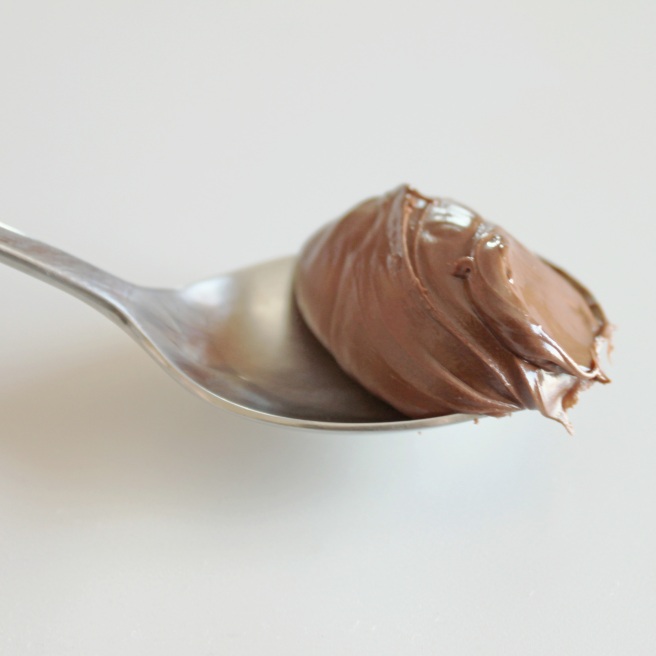
Or you could celebrate with a nice big spoonful.

Nutella Scones

  • 2 cups unbleached all-purpose flour
  • 1/4 cup granulated sugar
  • 1/4 cup dark sweetened cocoa powder (like Valrhona)
  • 1 tablespoon baking powder
  • 1/2 teaspoon salt
  • 6 tablespoons (3/4 stick) cold unsalted butter, cut into chunks
  • 1 large egg
  • 1/2 cup heavy cream
  • 3/4 cup toasted hazelnuts,coarsely chopped
  • 1/2 cup Nutella
  1. Preheat oven to 375. Line a baking sheet with parchment or a silicon mat.
  2. In a large bowl, whisk together the flour, cocoa*, sugar, baking powder, and salt. Add the butter* to the flour. Using your fingertips, rub the butter into the flour until the chunks of butter become pea sized and the flour holds together when squeezed.
  3. Whisk the cream and egg together. While mixing, slowly pour the cream mixture into the flour mixture until the dough just comes together. Stir in the hazelnuts*, then pour the dough onto a floured surface. Knead the dough into a 6 inch by 12 inch rectangle (doesn’t have to be exact).
  4. Spread 1/4 cup of the Nutella over the dough, then roll it into a cylinder. Flatten the cylinder into a disk, then slice it into wedges (6 or 8).
  5. Bake for 18 to 20 minutes.
  6. Once baked, place on a cooling rack. Warm the remaining 1/4 cup Nutella, then drizzle it over the cooling scones.

*Notes and tips

The recipe calls for sweetened cocoa, I used unsweetened and found them to be sweet enough.

For scones, cold butter is best. To get it into cubes, cut it while it’s slightly softened then put it in the freezer for a few minutes.

I omitted the hazelnuts because I didn’t have any on hand. They would probably add a really nice crunch, but I didn’t really miss them.

Enjoy!

Chocolate Banana Muffins

I had an incredible headache Thursday morning when I woke up. The kind that makes me want to lie perfectly still because any movement feels like an explosion in my brain. I stayed home from work and just lay in my bed for a few hours. It hurt too much to sleep or read, and the light from my computer or TV just intensified the pain. I let my mind just wander, if I wasn’t in pain it would have been kind of fun.

Eventually the pain lessened so I got up and started to work from home. Unfortunately my remote access wasn’t working. All of the emails in my inbox were from 2009, nothing I sent went through, and I had no access to any of the network drives. Oh well, I tried.

So what’s a girl to do on a Thursday afternoon when the rest of the world is hard at work? Make muffins of course.

These chocolate banana muffins are an attempt at eating healthy. Sort of. They’ve got whole wheat flour and no refined sugar. I probably could have cut back a little on the butter, but I figured I’d go one step at time, you know?


Chocolate Banana Muffins

  • 3/4 cup all purpose flour
  • 1/2 cup whole wheat flour
  • 1/4 cup cocoa powder
  • 1 1/2 tsp baking powder
  • 1/2 tsp salt
  • 3 very ripe bananas, mashed
  • 1 egg
  • 1/2 cup butter, melted
  • 1/4 cup milk
  • 1/2 cup cinnamon chips
  1. Preheat oven to 350. Line a muffin tin with liners.
  2. In a large bowl, stir together the flours, cocoa, baking powder and salt.
  3. In a separate bowl, mix the bananas, egg, butter, and milk together.
  4. Create a well in the dry ingredients, pour the wet into the well, then stir until just combined.
  5. Stir in the cinnamon chips.
  6. Pour batter into the lined muffin tin, about 3/4 full. Bake for 27-32 minutes until a tester comes out clean. Let cool for 5 minutes in pan, then move to a cooling rack to cool completely (if you can wait that long)

Enjoy!

Nutella Brownies

I made it 13 hours into 2011 before breaking my new years resolution. And then I had breakfast.

I had resolved to cut back on the sweets. I’m going with the “it’s not my fault” excuse. There were a ton of desserts at our New Years celebration. My cousin picked up an enormous Gateau St. Honoré for my birthday and refused to let me leave without taking the leftovers home with me. A Gateau St Honoré is basically a giant cream puff. This one was filled with pastry cream, chocolate pastry cream, whipped cream, and even had some pieces of chocolate cake in it. I couldn’t let it go to waste.  So I had a piece for breakfast. And another later in the day for dessert.

So my New Years resolution starts.. Now!

My contribution to the New Years celebration were Abby Dodge’s Nutella Brownies. If you read a reasonable number of food blogs, you’ve probably come across these already. A few months ago I saw post after post about how incredible these are. The reviews were right, these are awesome. I don’t know why I waited so long to make them.

They are also incredibly easy to make.  If you’re not much of a baker this recipe is a great place to start; there are only 4 ingredients and you don’t need to know any baking techniques.  If you can mix (or have a mixer) you can make these brownies. I found this recipe at Savory Sweet Life.

Nutella Brownies

  • 1/2 cup Nutella
  • 1 egg
  • 5 tbsp flour
  • icing sugar for dusting (you could also top with chopped hazelnuts)
  1. Preheat oven to 350. Grease a mini muffin tin.
  2. In a large bowl mix the Nutella and egg together until smooth.
  3. Add the flour, mix until completely incorporated.
  4. Try not to eat the batter, there is just enough to fill the muffin tins.
  5. Pour batter into mini muffin tin, filling till about 3/4 full.
  6. Bake for 10 to 12 minutes.
  7. Let cool completely, then dust with icing sugar.

Enjoy!

Merry Christmas! Have Some Stollen

The 2010 December Daring Bakers’ challenge was hosted by Penny of Sweet Sadie’s Baking. She chose to challenge Daring Bakers’ to make Stollen. She adapted a friend’s family recipe and combined it with information from friends, techniques from Peter Reinhart’s book and Martha Stewart’s demonstration.

Happy Holidays!

Christmas morning in my parents house is the same every year. We wake up, head to the living, open presents, then have breakfast. What we eat for breakfast is a tradition too. There’s a selection of Polish sausages, ham and other cold cuts, pate, rye bread and Babka. The meal isn’t fancy, but it says Christmas to me.

This year, since the Daring Bakers challenged us to make Stollen, we replaced the babka with it. Stollen is a traditional German Christmas bread, made with dried fruit. Penny added a twist to the challenge by asking us to make it in the shape of a wreath.

I actually made the recipe 3 times. The first time was a test run; I halved the recipe and baked it in a loaf pan. Unfortunately I took the bread out of the oven too soon, so the middle was not cooked through. The ends tasted wonderful though.

The second time I made it for an office brunch. Once again I used half the recipe, and I replaced the dried fruits with chocolate chunks, cinnamon chips, and cranberries. I shaped it like the Premiere Moisson Chocolate Cranberry Christmas bread, several balls of dough placed in a round pan. It was beautiful, and my coworkers seemed to love it. Unfortunately I didn’t take any pictures.

On Christmas Eve I baked it for the third time. Part of the joy of Christmas morning is slathering butter on a slice of babka, so I decided to split the recipe in half, part of it became a wreath and the rest was baked in a bundt pan so that we could cut off nice slices. I used the chocolate cranberry mix for the wreath, and the traditional dried fruits for the bundt.

Both turned out great. I’m glad I took the time to do the test runs, they gave me a chance to figure out how the dough rises and bakes. The recipe calls for an overnight rise in the fridge, however I also tried just letting it rise in a warm draft free space for two hours. Both ways worked well, and the taste was identical. Thanks for a great challenge, Penny!

Stollen

(makes two loaves)

  • ¼ cup (60ml) lukewarm water (110º F / 43º C)
  • 2 packages (4 1/2 teaspoons) (22 ml) (14 grams) (1/2 oz) active dry yeast
  • 1 cup (240 ml) milk
  • 10 tablespoons (150 ml) (140 grams) unsalted butter (can use salted butter)
  • 5½ cups (1320 ml) (27 ozs) (770 grams) all-purpose (plain) flour (Measure flour first – then sift- plus extra for dusting)
  • ½ cup (120 ml) (115 gms) sugar
  • ¾ teaspoon (3 ¾ ml) (4 ½ grams) salt (if using salted butter there is no need to alter this salt measurement)
  • 1 teaspoon (5 ml) (6 grams) cinnamon
  • 3 large eggs, lightly beaten
  • Grated zest of 1 lemon and 1 orange
  • 2 teaspoons (10 ml) (very good) vanilla extract
  • 3 cups dried fruits that have been soaked in rum or orange juice (I used cranberries, apricots and blueberries) OR 1 cup cinnamon chips, 1 cup chocolate chips, 1 cup fresh or frozen cranberries.
  1. Pour ¼ cup (60 ml) warm water into a small bowl, sprinkle with yeast and let stand 5 minutes. Stir to dissolve yeast completely.
  2. In a small saucepan, combine 1 cup (240 ml) milk and 10 tablespoons (150 ml) butter over medium – low heat until butter is melted. Let stand until lukewarm, about 5 minutes.
  3. Lightly beat eggs in a small bowl and add lemon and vanilla extracts.
  4. In a large mixing bowl (4 qt) (4 liters) (or in the bowl of an electric mixer with paddle attachment), stir together the flour, sugar, salt, cinnamon, orange and lemon zests.
  5. Then stir in (or mix on low-speed with the paddle attachment) the yeast/water mixture, eggs and the lukewarm milk/butter mixture. This should take about 2 minutes. It should be a soft, but not sticky ball. When the dough comes together, cover the bowl with either plastic or a tea cloth and let rest for 10 minutes.
  6. Add the dried fruit and knead for 8 minutes (6 if using an electric mixer fitted with a dough hook). If using the chocolate cranberry filling, start kneading with just the chocolate and cinnamon chips, then add the cranberries towards the end being very careful so that the dough doesn’t turn pink.
  7. Place dough in a greased bowl and cover with plastic wrap. Let rise in a warm dry place for two hours, or in the fridge overnight.
  8. Punch the dough down and form into your desired shape. Let rise for 1 hour.
  9. Preheat the oven to 350. The time to bake the dough will depend on the shape chosen. Using half the dough, the wreath took 35 minutes in my oven, and the bundt took 50 minutes.

Enjoy!