The February 2011 Daring Cooks’ challenge was hosted by Lisa of Blueberry Girl. She challenged Daring Cooks to make Hiyashi Soba and Tempura. She has various sources for her challenge including japanesefood.about.com, pinkbites.com, and itsybitsyfoodies.com
After missing last months Daring Cooks Challenge I was really excited to get to this one. I joined the Daring Cooks as a way to broaden my cooking horizons and push myself, and tempura is definitely new to me. In fact, I’ve never even tried it before. When I read the recipe I realized it’s basically just deep fried seafood and vegetables. My track record with deep frying is just so so, but I thought I could do this. I followed Lisa’s instructions to make the batter, then started heating the oil. Then the oil started to smoke well before the thermometer said the temperature was right. I started doubting the thermometer. That’s when the smoke detector went off. I turned off the heat, ran to the smoke detector and started waving a towel at it until it stopped. I took the battery out of the smoke detector then went back to work. My mistake in all this was that I didn’t check the temperature of the oil again after the smoke detector went off. I don’t think it was hot enough because both the shrimp and peppers were kind of soggy.
The moral of the story: take the battery out of the smoke detector before I start deep frying.

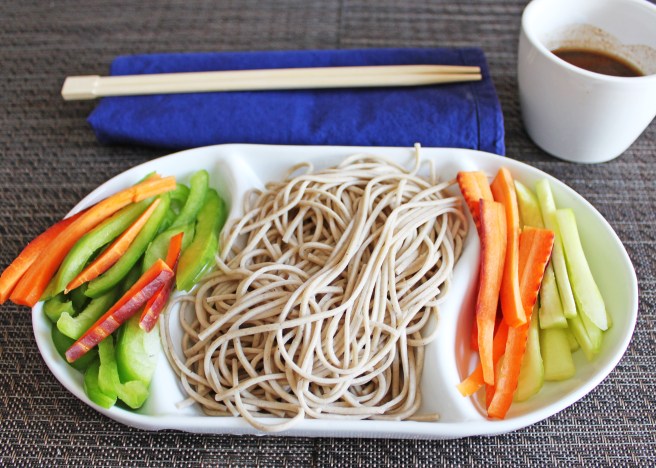
The second part of the challenge was to make a cold soba noodle salad. This part was less dramatic. I made the spicy dipping sauce to serve on the salad. I was a little disappointed with the sauce, I found it mostly tasted like soy sauce and sesame oil. Both are great flavours, bur I guess I was expecting something a little more complex.
Since I think I kind of failed at this challenge, I’m just going to paste the instructions exactly as written. My tips and changes are only useful if you like soggy deep fried foods.
Soba Noodles:
Ingredients
2 quarts (2 Liters) water + 1 cup cold water, separate
12 oz (340 g) dried soba (buckwheat) noodles (or any Asian thin noodle)
Directions:
Cooking the noodles:
- Heat 2 quarts of water to a boil in a large pot over high heat. Add the noodles a small bundle at a time, stirring gently to separate. When the water returns to a full boil, add 1 cup of cold water. Repeat this twice. When the water returns to a full boil, check the noodles for doneness. You want to cook them until they are firm-tender. Do not overcook them.
- Drain the noodles in a colander and rinse well under cold running water until the noodles are cool. This not only stops the cooking process, but also removes the starch from the noodles. This is an essential part of soba noodle making. Once the noodles are cool, drain them and cover them with a damp kitchen towel and set them aside allowing them to cool completely.
Spicy Dipping Sauce:
Ingredients
¾ cup 70gm/2½ oz spring onions/green onions/scallions, finely chopped
3 tablespoons (45 ml) soy sauce
2 tablespoons (30 ml) rice vinegar
½ teaspoon (2½ ml) (4 ⅔ gm) (0.16 oz) granulated sugar
¼ teaspoon (1¼ ml) (1/8 gm) (0.005 oz) English mustard powder
1 tablespoon (15 ml) grape-seed oil or vegetable oil
1 tablespoon (15 ml) sesame oil (if you can’t find this just omit from recipe.)
Sea salt and freshly ground black pepper to taste – roughly 1/3 a teaspoon of each
Directions:
1. Shake all the ingredients together in a covered container. Once the salt has dissolved, add and shake in 2 tablespoons of water and season again if needed.
Tempura
Ingredients
1 egg yolk from a large egg
1 cup (240 ml) iced water
½ cup (120 ml) (70 gm) (2½ oz) plain (all purpose) flour, plus extra for dredging
½ cup (120 ml) (70 gm) (2½ oz) cornflour (also called cornstarch)
½ teaspoon (2½ ml) (2½ gm) (0.09 oz) baking powder
oil, for deep frying preferably vegetable
ice water bath, for the tempura batter (a larger bowl than what will be used for the tempura should be used. Fill the large bowl with ice and some water, set aside)
Directions:
- Place the iced water into a mixing bowl. Lightly beat the egg yolk and gradually pour into the iced water, stirring (preferably with chopsticks) and blending well. Add flours and baking powder all at once, stroke a few times with chopsticks until the ingredients are loosely combined. The batter should be runny and lumpy. Place the bowl of batter in an ice water bath to keep it cold while you are frying the tempura. The batter as well as the vegetables and seafood have to be very cold. The temperature shock between the hot oil and the cold veggies help create a crispy tempura.
- Heat the oil in a large pan or a wok. For vegetables, the oil should be 320°F/160°C; for seafood it should be 340°F/170°C. It is more difficult to maintain a steady temperature and produce consistent tempura if you don’t have a thermometer, but it can be done. You can test the oil by dropping a piece of batter into the hot oil. If it sinks a little bit and then immediately rises to the top, the oil is ready.
- Start with the vegetables, such as sweet potatoes, that won’t leave a strong odor in the oil. Dip them in a shallow bowl of flour to lightly coat them and then dip them into the batter. Slide them into the hot oil, deep frying only a couple of pieces at a time so that the temperature of the oil does not drop.
- Start with the vegetables, such as sweet potatoes, that won’t leave a strong odor in the oil. Dip them in a shallow bowl of flour to lightly coat them and then dip them into the batter. Slide them into the hot oil, deep frying only a couple of pieces at a time so that the temperature of the oil does not drop.
- Place finished tempura pieces on a wire rack so that excess oil can drip off. Continue frying the other items, frequently scooping out any bits of batter to keep the oil clean and prevent the oil (and the remaining tempura) from getting a burned flavor.
- Serve immediately for the best flavor, but they can also be eaten cold.
Enjoy!


