Chocolate Hazelnut Snowballs

Snowball Cookies

Tonight, I was crucial to the success of a rescue operation.

It has been bitterly cold in Montreal this week, with today’s high around minus 15 degrees. My plan was to avoid the cold by sitting at home by the fire and napping/watching TV all day. Midway through Jeopardy the call came; my brother needed help. He had parked his car outside a metro all day and it wouldn’t start. Normally I would let my dad handle this type of situation, but this time it was decided we both would go. We donned our snow gear, grabbed the jumper cables and headed out.

When we arrived at the scene my brother looked half frozen, but he refused to put on a hat. The plan was to push my brothers car out of it’s parking space so that we could boost it. The men attempted to push the car while I got the cables.

But the car wasn’t moving.

So I headed over to help. And with my measly little pipe-cleaner arms I succeeded in getting the car moving.

I don’t know what they would have done without me. We got the car out of the spot, boosted it and everyone headed home, safe and sound.

Snowball cookies

Once home, I felt it was time to reward myself with a hot chocolate and a couple of these Chocolate Hazelnut Snowball cookies.The recipe was adapted from this one in the December Food and Wine. These were the last of the Christmas cookies I made this year. The texture is kind of similar to biscotti, a great cookie to have with a cup of tea or coffee.    I used hazelnuts instead the pecans called for in the recipe because of an allergy. I also cut the quantity of nuts used by half a cup, because I felt that the hazelnuts would overwhelm the cookie.

Chocolate-Hazelnut Snowballs

Makes 30-36 cookies

  • 1 1/2 cups hazelnuts, finely chopped
  • 1 cup unsalted butter, softened
  • 1/2 cup sugar
  • 2 tsp vanilla extract
  • 1 3/4 cups flour
  • 1/4 cup cocoa powder
  • 2 tsp instant espresso powder
  • 1/2 tsp salt
  • Icing sugar for coating
  1. Preheat the oven to 400 degrees F. Spread the hazelnuts on a baking sheet and roast them for 5 to 10 minutes until lightly toasted.
  2. In a large bowl, beat the butter, sugar and vanilla together until smooth.
  3. In a separate bowl, mix the flour, cocoa powder, espresso powder and salt together. Stir the flour into the butter mixture until well combined. Stir in the hazelnuts. Cover the dough in plastic wrap and chill for 1 hour.
  4. Preheat the oven to 325 degrees F. Roll the dough in to tablespoon sized balls and place on a lightly greased baking sheet. Bake for 15 to 18 minutes. The cookies will be slightly firm to the touch when done. Let cool for 10 minutes on the baking sheet, then cool completely on a rack.

Enjoy!

Egyptian Date Crescents

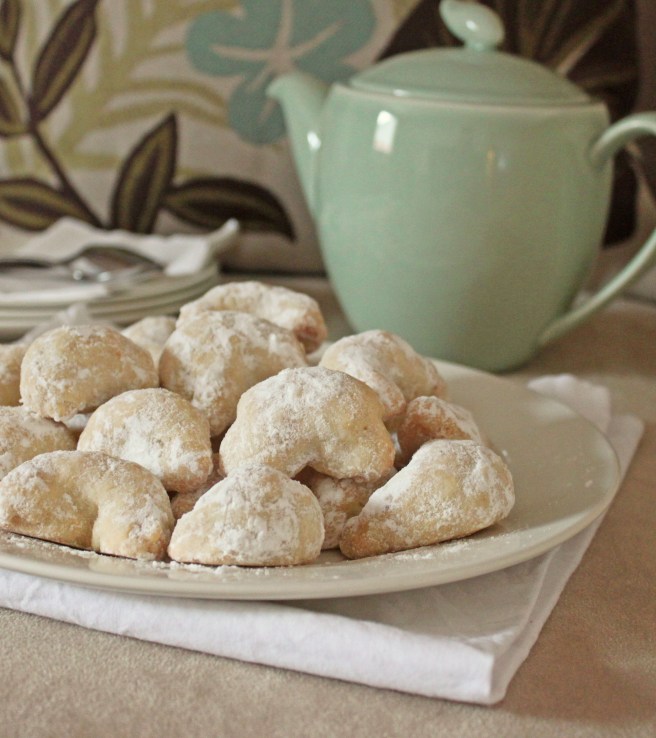
During our baking marathon last Friday my mom and I also made some cookies, including these Egyptian Date Cookies. We make them every year at Christmas and Easter for my dad. As we shaped these Egyptian cookies, my mom told me stories about what Easter was like when she was growing up in Poland. There was so much cooking and baking to do, the whole family would work for days in advance. Everyone you saw was invited to Easter dinner, and often people you hadn’t seen would just show up, so they had to be prepared for a lot of guests. On Easter Sunday no work was done. Everyone would go to church and then families and friends would all get together to celebrate.

Things are a little different now, as it was just my immediate family at our celebration this year. We still had quite a feast though. First was breakfast made up of Polish sausage and ham, rye bread, hard boiled eggs, and babka. It’s a very Polish meal. Then after a quick visit to the Saint Joseph Oratory on Mount Royal (a beautiful basilica with very challenging steps leading up to it, every time I go I hear the Rocky theme music in my head), we got to work on dinner. Roast lamb, stuffed vines leaves, rice, potatoes, salad. Then came my favourite part, dessert; a light cake and these cookies.

One of the advantages of having my mom around while baking is that I was able to take “how to” pics. Here’s a visual on how to form the crescents:

Egyptian Date Crescents

Makes about 50 cookies

  • 4 cups flour
  • 1 lb butter at room temp, cut into pieces
  • 1 tsp rose water
  • 1/2 cup milk
  • 1 package pressed dates
  • icing sugar for coating
  1. Preheat oven to 400.
  2. Using your hands, combine the butter and flour until it holds together when squeezed and there are no large pieces of butter.
  3. Add the rose water and milk. Stir until well combined. The dough should have a play dough like consistency.
  4. Take about a tablespoon of dough, form it into a ball. Press the center of the ball down, creating dent in the dough. Place a small amount of the pressed dates into the indentation. Close the dough up, then twist into a crescent. (See pictures above)
  5. Bake for 15 minutes, until the bottom of the cookies are just golden.
  6. Let cool completely, then cover in icing sugar.
These cookies will keep in an airtight container for about a week.
Enjoy!

Easter Babka Three Ways

Happy Easter!

This year Easter is going to be at my place. Normally we would have it at my parents, but their oven broke and won’t be repaired in time. Most of the prep is still being done by my parents. Right now they are marinating a huge leg of lamb that will be roasted here tomorrow. My mom is also taking care of the pierogi, and the stuffed vine leaves (we have a multicultural Easter, part Polish, part Egyptian). All of the baking was done here yesterday. My mom came over around 10 and we baked all day.

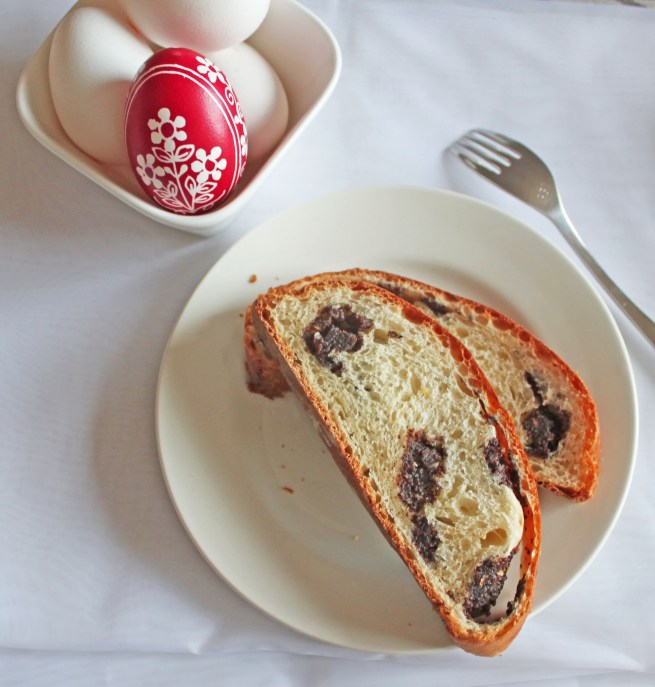
The first thing we made were the Babkas. Babkas are a traditional Eastern and Central European yeasted sweet bread that are served for Easter. The traditional version is flavoured with dried fruit. That’s what my mom always makes. This year, I wanted to try something a little less traditional, chocolate babka.

My mom wasn’t super enthusiastic at first, but then I reminded her of the Seinfeld episode where Elaine tries to buy a chocolate babka. Everyone loves chocolate babka! That helped convince her. Once we decided to veer from the traditional, my mom suggested a third option, poppy seed babka. 

So we made all three.

We made one batch of dough and divided it into three, using a different filling for each. In the traditional version, we used raisins and dried apricots soaked in rum. For the poppy seed version we used a store bought poppy seed paste that also had raisins and candied orange peel. The chocolate version was originally based on Smitten Kitchens technique. Unfortunately, the dough we used could not hold up to the weight of the chocolate and sort of .. imploded. So this morning I made another chocolate babka. This time I used Smitten Kitchens dough recipe and just added chunks of chocolate. Her babka dough is very similar to a brioche recipe. Although it tasted very good, I found my moms recipe much easier to work with. My moms also has a much lighter texture. I can understand now why her chocolate babka didn’t implode, the dough is much stronger.

This basic dough can be used with any filling or flavourings. It makes enough for three loaves.

Basic Babka Dough

  • 5 tsps dry active yeast
  • 1 cup warm water
  • 4 whole eggs
  • 2 egg yolks
  • 8 cups all purpose flour, divided
  • 1/2 tsp salt
  • 2 cups milk, warm
  • 1/2 cup sugar
  • 1/4 cup butter, melted
  • 2 tsps vanilla
  • 2 tbsp dark rum
  • zest of one orange
  1. Sprinkle the yeast over the warm water. Add a pinch of sugar and set aside for the yeast to dissolve. Note, make sure the water is below 105 degrees F, otherwise it might kill the yeast.
  2. While the yeast is dissolving, whisk the eggs slightly.
  3. Put 6 cups of flour and the salt in the bowl of a standing mixer (or a large bowl if kneading by hand). Create a well, and pour in the eggs, yeast, warm milk, melted butter, vanilla, and rum. Add the orange zest. Stir with a wooden spoon until just combined, then place in the mixer with the dough hook attached and knead. Slowly add the remaining two cups of flour. Knead for 10 minutes. If kneading by hand, this will take about 30 minutes.
  4. If using dried fruit or chocolate chunks, add them to the mixer at this point and knead until combined.
  5. Divide dough into three and place in separate greased bowls. Cover with plastic wrap let rise for an hour until doubled in bulk (or overnight in the fridge).
  6. Punch down the dough. If using a filling like the poppy seed paste or a chocolate spread, roll the dough out into a rectangle, spread the filling over the dough, then roll the dough tightly like a jelly roll.
  7. Place dough in a loaf pan, baking sheet or bundt pan. Cover, and let rise for 30 minutes.
  8. Preheat the oven to 350.
  9. Bake the babka for 15-20 minutes, then lower the heat to 325 and bake for another 15 to 20. Note, if using a loaf pan it may take a few extra minutes. When done, the bread will sound hollow if tapped.
Enjoy!

Chocolate Nutella Bites

The idea for these cookies came to me in the shower, which means it could have been genius or madness. A ball-shaped shortbread cookie with a Nutella filling, sort of like a cookie truffle. There were some technical issues that had to be addressed, namely how to make a ball out of a spread. My solution was to chill the Nutella for 30 minutes, scoop it out using a mini melon baller then freeze the balls for 30 minutes.

The next issue was would the cookie dough hold its shape, or would they turn into a leaky Nutella mess? The only way to find out was to try, and these were a definite success. They kept a fairly round shape, and the Nutella stayed put in all of them.

Best of all, they were delicious; the perfect blend of chocolate and hazelnut flavours.

I think these are destined to become a holiday tradition.

Chocolate Nutella Bites

  • 1/2 cup Nutella
  • 4 oz bittersweet chocolate
  • 1/2 tsp espresso powder
  • 1/2 cup superfine sugar
  • 1 cup unsalted butter
  • 2 tbsp cornstarch
  • 1/2 tsp salt
  • 2 cups flour
  • icing sugar for dusting
  1. Put the Nutella in the fridge for at least 30 minutes till hardened. Using a mini melon baller scoop out 24 balls, place them on wax paper then freeze for 30 minutes.
  2. While the Nutella is freezing, make the cookie dough. Melt the chocolate with the espresso powder, set aside.
  3. In a large bowl, beat the butter and sugar together until fluffy. Blend in the chocolate, followed by the cornstarch and salt.
  4. Mix in the flour until a smooth dough is formed.
  5. Eat some cookie dough (for quality control)
  6. Shape the dough into a log, cover in plastic wrap and refrigerate for 20 minutes.
  7. Once the dough has chilled, slice it into 24 even circles. Take a circle, put a Nutella ball in the center then using your hands roll it into a circle, making sure there are no seems. Repeat for the remaining dough/nutella. Refrigerate for 30 minutes.
  8. Preheat the oven to 350.
  9. Bake for 15-18 minutes.
  10. While the cookies are baking put your face up to the oven window and watch. Pray your cookies don’t leak.
  11. Once cooked, let them cool completely then sprinkle with icing sugar.

Enjoy!

I’ll Never Be A Princess Pie

I heard some news last week that made me very, very sad. Prince William and Kate Middleton are now engaged. With this news the reality that I will never be a princess came crashing down on me. Sure, it’s unlikely that I’d ever meet Prince William, but as long as Kate was just “the girlfriend” there was still hope. That hope is now gone.

So I turned to the food that brings me the most comfort; pie. In this case Pear and Cranberry Hand Pies from Food & Wine Magazine. The recipe calls for store bought all butter puff pastry. I didn’t have any on hand so I decided to make my own. Now before you get all impressed with my mad skills, I used Nick Malgieri’s Quick Puff Pastry recipe from Bake! Although it doesn’t rise as much as a traditional puff pastry, for a recipe like this where height is not required it’s perfect. And it’s as easy to make as a traditional pie crust.

The hand pies are delicious. One bite brought me right back to my usual happy self. And it reminded me that while Prince Harry is a little young for me, he does meet the half my age plus seven criteria.

I think.

This is my Magazine Monday submission for this week. Head over to Cream Puffs in Venice every Monday to see what other bloggers have cooked up from their magazine collections

Pear and Cranberry Hand Pies

  • 2 pears, cored, peeled and dice into 1/4 inch cubes
  • 3/4 cup cranberries
  • 1/3 cup sugar, plus 1 tbsp for sprinkling
  • 1 tbsp all purpose flour, plus more for dusting
  • 1 pinch ground cinnamon
  • 1 pinch salt
  • 1 batch of Quick Puff Pastry or a 14 oz package of all butter puff pastry
  • 1 egg, beaten
  1. In a medium bowl, toss the pears, cranberries, sugar, flour, cinnamon and salt together.
  2. On a lightly floured surface, roll out the puff pastry until 1/8 inch thick. Cut out 12 four inch circles.
  3. Spoon some of the pear filling into the center of half the circles. Brush some of the egg on the edges of the dough, then cover with the remaining circles. Press the edges together making sure they are tightly sealed. Cut slits into the top of each hand pie to let some of the steam escape.
  4. Refrigerate for 30 minutes.
  5. Preheat the oven to 400 degrees.
  6. Brush the tops of the hand pies with the egg wash, then bake for about 30 minutes until the crust is a nice golden brown.

Enjoy!