Chocolate Pear Tart

crab apple blossoms

For a few days every Spring, the crab apple tree in my parents backyard blooms with the prettiest pink flowers. After a day or two, petals start showering down until there is just one little flower left. The backyard is like a little sanctuary; surrounded by trees on all one could almost think they were in the country. Almost. I like to sit out there on the weekends with a nice cup of coffee and just enjoy the weekend, it helps take the stress of the week away.

My doctor recently told me to try not to stress. Easier said than done. He also told me to cut back on caffeine. He then went on to list things that have caffeine in them; coffee, tea, soda, chocolate…

Chocolate?

I know that chocolate has caffeine in it, but the idea of taking chocolate out of my life as a way to reduce stress just seems like madness to me. So I have decided to selectively follow his advice. I don’t eat that much chocolate, but I’m not prepared to give up what I do have.

This tart wasn’t made to intentional defy the doctors orders, but he may have put the idea of chocolate into my head. I was flipping through Martha Stewart’s New Pies and Tarts, when I came across this recipe. I had all the ingredients and it looked really easy and quick to put together so I figured I’d give it a try. I was right, it was really easy to put together, but I’m not sure it could be made without a food processor. A few drops did drip out of the tart pan, so if you decide to make this placing a baking sheet on the rack below that tart.

Basically a flourless chocolate cake with pears, this tart is intensely chocolatey. The pear and chocolate were a really nice combination, and the almond rounded all the flavours out. I did find it a little too moist, I think some of the juice from the pear seeped into the tart.

Chocolate Pear Tart

Adapted very slightly from Martha Stewart

  • 1/2 cup unsalted butter at room temperature
  • 1 cup slivered almonds
  • 3/4 cups granulated sugar
  • 3 large eggs
  • 1/3 cup cocoa powder
  • 1/2 tsp salt
  • 1 tbsp almond liqueur
  • 3 firm, ripe pears
  • 2 tbsp apricot or apple jelly
  1. Preheat the oven to 350F. Grease a 9 inch tart pan, set aside.
  2. In a food processor, combine the almonds and sugar until finely ground. Add the butter, eggs, cocoa, vanilla and almond liqueur. Process until well combined. Pour into the prepared tart pan. 
  3. Peel, core and slice the pears and place them on the tart. Bake for 45 to 50 minutes, until a tester comes out clean. Heat the jelly slightly then brush on the pears. Let the tart set for 20 minutes before removing from the pan. 
Enjoy!

Chocolate Marzipan Cake

Cake

In exactly seven months I will be living in my brand new condo. I went down to the construction site last week, the building is far from done but it is definitely a building. I’m getting pretty excited thinking about living there. I’ve been scoping out deals on line for all the things I need. I think I’ve got my couch and bed picked out, and I’m now moving on the colour schemes. What do you think of white, grey, and yellow?

I’m also getting really nervous. A downtown condo on my own is a huge deal financially. I’ve gone over the budget a million times, and even though I know I can do it I still worry. I’m good at worrying. I sometimes find myself stuck in a loop of “what ifs”. My latest solution is to give myself a firm action plan and then listen to Bob Marley. Every little thing is gonna be alright.

flowers

Of course the classic stress reliever is chocolate. This cake will calm me down even on my most anxious days. Thanks to the marzipan it’s dense and moist, and the almond flavour perfectly complements the chocolate. This recipe is also really easy to make, just be sure your ingredients are at room temperature so that the eggs and butter combine properly.

cake

Chocolate Marzipan Cake

Adapted from Anna Olson

  • 1 cup unsalted butter, room temperature
  • 1/2 cup sugar
  • 250 g marzipan
  • 6 eggs, room temperature
  • 1 tsp vanilla extract
  • 1/2 tsp almond extract
  • 1/2 cup all purpose flour
  • 1/2 cup cocoa powder
  • 3/4 tsp baking powder
  • 1/2 tsp salt
  • 1 cup whipping cream
  • 1/4 cup icing sugar
  • berries to garnish
  1. Preheat the oven to 350 F. Grease and flour a 10 inch springform pan, set aside.
  2. In a large bowl, beat the butter and sugar together until light and fluffy with an electric mixer. Break the marzipan into pieces and mix into the butter mixture until smooth.  Beat in the eggs one at a time, making sure they are well combined after each addition. Mix in the vanilla and almond extracts. 
  3. Sift the flour, cocoa, baking powder and salt. Beat into the butter mixture until well combined. 
  4. Pour the cake batter into the prepared pan. Bake for 35 to 45 minutes until a tester comes out clean. Let the cake cool in the pan for 20 minutes then turn it out onto a rack to cool completely.
  5. Whip the cream with the icing sugar until stiff, cover the cooled cake with cream. Garnish with berries. 
Enjoy!

Peanut Butter Chocolate Chip Sandwich Cookies

peanut butter chocolate chip cookies

While watching a recent episode of Criminal Minds I learned that people identify most with the music they listened at the age of 14. I guess that explains why I know the lyrics to so many Ace of Base songs. And why I think Meatloafs I Would Do Anything For Love (But I Won’t Do That) is one of the greatest car singing songs of all time. 1994 was a good year in music. Remember this classic? (please note the Habs jersey in the video)

peanut butter chocolate chip cookies

Despite some awfully cheesy songs , I really do identify with the music from that year. I spent hours listening to The Cranberries, Melissa Ethridge. I think I had that Lisa Loeb song on repeat for a good 6 months (taped off the radio of course, with the inevitable announcer’s voice cutting into the song). And I’m still looking for a man like the one Salt-n-Pepa kept singing about.

peanutbutterlove

This all got me thinking about the types of food I identify with and when those connections were made. My taste in food, like my taste in music, has changed over the years. Some foods I’ll always love though, and those loves were forged way before my 14th birthday. Grilled cheese sandwiches, my moms pancake soup, stuffed vine leaves (random, I know).

Cookies and Milk

And, of course, cookies. As a kid I would have told you that the classic chocolate chip cookie could not be beat, but I would have been wrong. All you need to take chocolate chip cookies to the next level is a little peanut butter, another childhood favourite. If you want to make them out of this world, just sandwich some chocolate and peanut butter filling between two cookies. I made these for the Super Bowl under the guise of “go big or go home”, and they did not disappoint. The cookies should be a little chewy, so be careful not to over bake them or they’ll get too crisp. The recipe makes about 36 cookies, or 18 sandwiches. Recipe adapted from Bon Appetit.

Chocolate Marshmallows

I’m sure many of your diets have switched away from rich holiday meals and desserts to something a little more reasonable for every day life. I’ve been trying to do the same, but my mind keeps wandering back to sugary treats. I think I may have an addiction. I have a hard time going more than a day without something sweet to calm the cravings. It’s hard to believe that not too long ago I cut sugar and gluten completely from my diet.

One of the sweet visions that I go back to regularly are these Chocolate Marshmallows I made in December. There is nothing quite like a homemade marshmallow. Although you can see the resemblance to store bought, looks are really all they have in common. Homemade are much more flavourful, their texture light and fluffy. Unlike store bought, I could eat them as is, no need for anything else.

It was quite the adventure making these, not that the recipe is difficult, I was just having a particularly klutzy weekend. I made a batch and was about to unmold it when somehow I dropped the whole pan on the kitchen floor, sticky side down (of course). There is no 5 second rule when it comes to sticky marshmallow, I had to scoop it up in chunks with my hands, the whole thing ruined.

I still wanted marshmallows, so I made another batch. This time the entire marshmallow making process went off without a hitch.

Unfortunately the photo session didn’t turn out so well. I took a few shots like the one above then started to take photos of the marshmallows in a mug of hot chocolate. It was a gloomy day out, so I had a whiteboard set up to bounce some light onto the mug. I have no idea exactly what happened, but while I was shooting, the white board fell over onto the mug, causing it to topple over and the hot chocolate to spill. There was hot chocolate everywhere; on the table, the carpet, even on my parents upholstered dining room chairs. Disaster. After scrambling to clean it all up I decided there was only one thing to do: sit down and eat marshmallows.

Marshmallows make everything better.

Chocolate Marshmallows

(makes approx 36 marshmallows)

  • 2 tablespoons gelatin
  • 2/3 cup water
  • 3/4 cup sugar
  • 1/2 cup clear corn syrup
  • 4 oz dark chocolate, melted
  • 1/4 cup cocoa powder
  1. Line an 8 by 8 inch pan with plastic wrap and lightly grease the plastic.
  2. In a small sauce pan, sprinkle the gelatin over the water and let the gelatin expand. Add the sugar to the pan and gently heat while stirring until the sugar has dissolved completely.
  3. Pour the sugar and gelatin mixture into the bowl of an electric mixer. Add the corn syrup and then beat for 10 to 12 minutes until the mixture forms stiff peaks. Stir in the chocolate using a spatula to mix.
  4. Pour into the prepared pan spreading with a greased spatula. Refrigerate for about 1 hour until well set.
  5. Cover a work area with half the cocoa powder. Unmold the marshmallow onto the cocoa powder, then cut into squares using scissors or a pizza cutter. Cover each square with the remaining cocoa powder.
  6. Keep in a well sealed container at room temperature for 3-4 days. (if they make it that long)

Enjoy!

Chocolate Hazelnut Snowballs

Snowball Cookies

Tonight, I was crucial to the success of a rescue operation.

It has been bitterly cold in Montreal this week, with today’s high around minus 15 degrees. My plan was to avoid the cold by sitting at home by the fire and napping/watching TV all day. Midway through Jeopardy the call came; my brother needed help. He had parked his car outside a metro all day and it wouldn’t start. Normally I would let my dad handle this type of situation, but this time it was decided we both would go. We donned our snow gear, grabbed the jumper cables and headed out.

When we arrived at the scene my brother looked half frozen, but he refused to put on a hat. The plan was to push my brothers car out of it’s parking space so that we could boost it. The men attempted to push the car while I got the cables.

But the car wasn’t moving.

So I headed over to help. And with my measly little pipe-cleaner arms I succeeded in getting the car moving.

I don’t know what they would have done without me. We got the car out of the spot, boosted it and everyone headed home, safe and sound.

Snowball cookies

Once home, I felt it was time to reward myself with a hot chocolate and a couple of these Chocolate Hazelnut Snowball cookies.The recipe was adapted from this one in the December Food and Wine. These were the last of the Christmas cookies I made this year. The texture is kind of similar to biscotti, a great cookie to have with a cup of tea or coffee.    I used hazelnuts instead the pecans called for in the recipe because of an allergy. I also cut the quantity of nuts used by half a cup, because I felt that the hazelnuts would overwhelm the cookie.

Chocolate-Hazelnut Snowballs

Makes 30-36 cookies

  • 1 1/2 cups hazelnuts, finely chopped
  • 1 cup unsalted butter, softened
  • 1/2 cup sugar
  • 2 tsp vanilla extract
  • 1 3/4 cups flour
  • 1/4 cup cocoa powder
  • 2 tsp instant espresso powder
  • 1/2 tsp salt
  • Icing sugar for coating
  1. Preheat the oven to 400 degrees F. Spread the hazelnuts on a baking sheet and roast them for 5 to 10 minutes until lightly toasted.
  2. In a large bowl, beat the butter, sugar and vanilla together until smooth.
  3. In a separate bowl, mix the flour, cocoa powder, espresso powder and salt together. Stir the flour into the butter mixture until well combined. Stir in the hazelnuts. Cover the dough in plastic wrap and chill for 1 hour.
  4. Preheat the oven to 325 degrees F. Roll the dough in to tablespoon sized balls and place on a lightly greased baking sheet. Bake for 15 to 18 minutes. The cookies will be slightly firm to the touch when done. Let cool for 10 minutes on the baking sheet, then cool completely on a rack.

Enjoy!

Chocolate Mousse Cake with Pomegranate

Have you ever started to write a sentence in a card then completely lose your train of thought? It happens to me all the time. In fact it happened to me this weekend. I was signing a card for my friends wedding and for some reason I started a sentence with “after”. I’m still not sure where I meant to go with that. I do know that what I ended up writing might not have made much sense, I got myself all flustered. So Steph, if you’re reading this, I meant to say I love you and I’m so happy for you.

chocolate mousse cake with pomegranate overhead The wedding had me in a celebratory mood the following day. Celebrations to me mean cake, and the best cake I can think of is my mom’s famous chocolate cake. Family members have left their sick beds for a slice of that cake. I would to share the actual recipe with you, but my mom honestly can’t say what the recipe is. It’s been altered and modified so many times it only exists in her mind. I can tell you it’s chocolate cake spiked with Kahlua, with layers of ganache and whipped cream. I based this cake on that but made it my own. I used a chocolate genoise baked in a jelly roll pan, and filled it with chocolate mousse and whipped cream.  I think chocolate can always use a little fruit, so I topped the cake with pomegranate seeds. And, of course, I spiked the cake layers with Kahlua.


Chocolate Mousse Cake with Pomegranate

For the Chocolate Genoise

  •  1 cup all purpose flour
  • 1/3 cup cocoa powder
  • 4 tbsp butter
  • 6 eggs
  • 1 cup sugar
  1. Preheat the oven to 400 F. Line a 15 by 10 inch jelly roll pan with parchment, then grease the parchment.
  2. Sift the flour and cocoa together. Set aside.
  3. Melt the butter. Set aside to cool.
  4. In a large heat proof bowl, whisk the eggs and sugar together. Place the bowl over and pot  with 1 inch of simmering water and whisk until the eggs reach a temperature of 130 F, about 4 minutes depending on the size of the bowl and pot. Remove the bowl from the heat. Using an electric mixer (hand held or standing) beat the eggs until the have tripled in volume are back to room temperature (about 10 minutes).
  5. Fold the flour into the eggs in three additions. Stir a spoonful of the batter into the butter, then fold the butter into the batter gently. The batter will deflate a little at this point.
  6. Pour the batter into the prepared baking sheet, then bake for 10 to 12 minutes, until the center springs back when touched.

For the Chocolate Mousse

  • 4 oz semi sweet chocolate, chopped
  • 2 tbsp butter
  • 1/2 tsp cinnamon
  • 2 eggs separated
  • 1/8 tsp cream of tartar
  1. Over a double boiler, melt the chocolate and butter. Add the cinnamon once melted. Set aside to cool.
  2. Whisk the egg yolk till double in volume and the colour has lightened. Mix into melted chocolate. Refrigerate while whipping the egg whites.
  3. In a large bowl, whisk the egg whites and cream of tartar to stiff peaks.
  4. Take a small amount of the egg whites and mix it into the chocolate to thin the chocolate, then fold the chocolate into the egg whites.
  5. Set aside.
For the Cream
  • 1 cups35% cream
  • 1 tbsp icing sugar
  1. Using an electric mixer, whip the cream until soft peaks. Add the sugar and continue whisking until stiff peaks form.
For the Kahlua Syrup
  • 1 cups sugar
  • 1/2 cup Kahlua
  • 1 cups water
  1. In a saucepan bring sugar and water to boil. Remove from the heat, let cool, then add the Kahlua.
To assemble
  • Seeds from 1 pomegranate
  1. Slice the cake into three 5 by 10 inch slices. Place the bottom layer on the serving plate. Soak with 1/3 of the Kahlua syrup, then top with the chocolate mousse. Place another layer of cake on top of the chocolate mousse. Soak that layer with 1/2 of the remaining Kahlua syrup. Top that layer with half of the whipped cream. Place the final layer of cake on top of the whipped cream layer. Soak with remaining Kahlua syrup. Top with the remaining whipped cream, then decorate with the pomegranate seeds.
  2. Chill for at least 1 hour before serving to allow the cake to set.
Enjoy!


Love Vermont Chocolate Fudge Brownies

I’ve mentioned before that up until a few years ago my parents rented a cottage off Lake Memphremagog every summer. It was a beautiful place. The cottage was right on the water, we would sit on the dock with a cup of coffee and enjoy the sights and sounds. To me there is nothing more soothing than the sound of water lapping the shore. Around the cottage there were woods and trails. Before 9/11 you could wander through the woods and accidentally end up in Canada. The woods are much more heavily guarded now. Things change.

Since we stopped renting the cottage I’ve been to Vermont a handful of times. So when a friend of mine posted on Facebook that she had booked a trip to Burlington and could no longer go, I jumped at the chance to buy it from her.

My mom and I drove down Sunday afternoon. We stayed at the Essex Inn and Culinary Institute, about 15 minutes from downtown Burlington. Although the inn is nowhere near water, it immediately reminded me of the cottage. The air was crisp and clean, surrounding the inn are woods with hiking trails. Sadly, the trails were washed out by Irene, with trees blocking several paths. This was one of the first signs that Vermont is still recovering from the storm.

Our original plan was to spend one day in Burlington and to spend another driving around Vermont. Burlington is lovely. It’s a small city, but there’s so much to do. We shopped the Church Street Marketplace, enjoyed some local chocolates from Lake Champlain Chocolates, and ate at Leunig’s Bistro.  In the afternoon we walked to the Lake Champlain Waterfront, where we met a couple from Kent, England. These very kind people highly recommended the boat tour of Lake Champlain, unfortunately we didn’t have enough time to take it.

My favourite part of the trip took place Monday evening. We had dinner at the Inn then went for a walk around the grounds. It was a cool night which I wasn’t dressed for and I was about to suggest we go back inside when we saw a bonfire being built. We decided to sit by the fire to warm up. We were joined by an eclectic group of Inn guests, and soon we were roasting marshmallows and all singing along to John Denver songs by the fire.

“Take me home, country road…” 

It was a wonderful night and highlighted what I like most about Vermont: the people.

We changed our plans to drive around because of the roads and bridges that are still washed out. Vermont was hit unexpectedly hard by Irene, and they are still recovering. In addition to washed out roads, there are people who have lost their homes, farmers whose crops were destroyed. The photos of the damage are heartbreaking. El of Fresh New England has set up a page for those of you who would like to help here. She’s also asked that we make Love Vermont Chocolate Fudge Cake . I chose to make brownies instead, although I didn’t follow El’s recipe, these brownies were made with love.

Love Vermont Fudge Brownies

  • 6 oz semi sweet chocolate
  • 1/3 cup unsalted butter
  • 3/4 cup granulated sugar
  • 1 tsp vanilla
  • 2 eggs at room temperature
  • 1/2 cup all purpose flour
  • 1/2 tsp salt
  • 1/4 cup maple chips
  • 1/4 cup white chocolate chips
  1. Preheat the oven to 350 F.
  2. Over a double boiler, melt the chocolate and the butter together, stirring until smooth. Let cool slightly, then stir in the sugar, followed by the vanilla.
  3. Stir in the eggs 1 at a time, then add the flour and salt. Stir until no traces of flour are visible, then add the chips.
  4. Pour into a greased 8×8 baking pan, then bake for 22 to 27 minutes until a tester comes out clean. The longer the brownies are baked, the more cake-like they will be.
  5. Let cool, then cut into squares.
Enjoy!

Chocolate Cherry Bread Pudding

In my condo I had pretty basic equipment. When I first moved in my budget for appliances was .. well it was low. I bought the cheapest fridge and stove that I could find, and I waited a couple of years before buying a washer and dryer. Even though it was inexpensive, my stove always got the job done. Bread, cakes, roasts; you name it, it was tasty. My only regret was that it wasn’t self cleaning. I didn’t realize how horrible cleaning an oven is until I had to get in there and do it.

Now that I’m back at my parent’s house I have a brand new stove. It’s a lot fancier than what I’m used to. A friend of mine told me that some baked goods don’t work in gas stoves. He didn’t know what wouldn’t work, and I’m not sure I believe it, but I was curious. I decided I’d need to start baking a variety of things to see.

I originally planned a cherry clafoutis, but then I saw this recipe for Vanilla Cherry Bread Pudding. My mind immediately went back to the chocolate babka I made this easter. The first one imploded due to the weight of the chocolate. It failed as a loaf, but it tasted great so I had cut it into chunks and freeze for a bread pudding. Chocolate Cherry Bread Pudding became my first baking experiment in my new oven.

I made a couple of changes to the recipe, the biggest being that I used chocolate babka instead of plain brioche. I also used Amaretto instead of port in the cherry compote. I left out the maple anise ice cream and simply used vanilla ice cream. The results were really, really good. Chocolate and cherry is one of my favourite flavour combinations. The only thing I’d change would be to add more cherry.

I know that most of you don’t have a chocolate babka sitting in the freezer waiting to become bread pudding, so I recommend using brioche and 8 ounces of bittersweet chocolate chopped.

Chocolate Cherry Bread Pudding

  • 45 sweet cherries, pitted
  • 1/2 cup sugar
  • 1/2 cup Amaretto
  • 1 chocolate babka or 1 loaf brioche and 8 oz bittersweet chocolate
  • 3 cups whole milk
  • 2 tsp vanilla
  • 2/3 cup granulated sugar
  • 1/4 teaspoon salt
  • 3 large egg yolks
  • 3 large eggs
  • 1 tablespoon unsalted butter, at room temperature
  1. Make the cherry compote: In a saucepan bring the Amaretto and sugar to a simmer for 5 minutes. Add the cherries and continue to simmer for 5-10 minutes, until the cherries have softened and the liquid has thickened. Pour into a heat proof jar, then place the jar in an ice bath to cool the compote. Set aside.
  2. Make the bread pudding. In a large saucepan, bring the milk and vanilla to a simmer. While the milk is heating, whisk eggs, 2/3 cup sugar and salt together in a large bowl. Once the milk is simmering, pour a small amount into the egg mixture while whisking. Then pour the rest of the milk, whisking constantly.
  3. Grease a 6 by inch baking dish with the butter. Place half of the babka pieces in the baking dish, cover with half the cherry compote, then the remaining babka. Pour the egg/milk over the bread. Let the milk soak for 5 minutes then bake at 350 for 30 to 40 minutes.
  4. Serve with vanilla ice cream topped with the remaining cherry compote.
Enjoy!

Easter Babka Three Ways

Happy Easter!

This year Easter is going to be at my place. Normally we would have it at my parents, but their oven broke and won’t be repaired in time. Most of the prep is still being done by my parents. Right now they are marinating a huge leg of lamb that will be roasted here tomorrow. My mom is also taking care of the pierogi, and the stuffed vine leaves (we have a multicultural Easter, part Polish, part Egyptian). All of the baking was done here yesterday. My mom came over around 10 and we baked all day.

The first thing we made were the Babkas. Babkas are a traditional Eastern and Central European yeasted sweet bread that are served for Easter. The traditional version is flavoured with dried fruit. That’s what my mom always makes. This year, I wanted to try something a little less traditional, chocolate babka.

My mom wasn’t super enthusiastic at first, but then I reminded her of the Seinfeld episode where Elaine tries to buy a chocolate babka. Everyone loves chocolate babka! That helped convince her. Once we decided to veer from the traditional, my mom suggested a third option, poppy seed babka. 

So we made all three.

We made one batch of dough and divided it into three, using a different filling for each. In the traditional version, we used raisins and dried apricots soaked in rum. For the poppy seed version we used a store bought poppy seed paste that also had raisins and candied orange peel. The chocolate version was originally based on Smitten Kitchens technique. Unfortunately, the dough we used could not hold up to the weight of the chocolate and sort of .. imploded. So this morning I made another chocolate babka. This time I used Smitten Kitchens dough recipe and just added chunks of chocolate. Her babka dough is very similar to a brioche recipe. Although it tasted very good, I found my moms recipe much easier to work with. My moms also has a much lighter texture. I can understand now why her chocolate babka didn’t implode, the dough is much stronger.

This basic dough can be used with any filling or flavourings. It makes enough for three loaves.

Basic Babka Dough

  • 5 tsps dry active yeast
  • 1 cup warm water
  • 4 whole eggs
  • 2 egg yolks
  • 8 cups all purpose flour, divided
  • 1/2 tsp salt
  • 2 cups milk, warm
  • 1/2 cup sugar
  • 1/4 cup butter, melted
  • 2 tsps vanilla
  • 2 tbsp dark rum
  • zest of one orange
  1. Sprinkle the yeast over the warm water. Add a pinch of sugar and set aside for the yeast to dissolve. Note, make sure the water is below 105 degrees F, otherwise it might kill the yeast.
  2. While the yeast is dissolving, whisk the eggs slightly.
  3. Put 6 cups of flour and the salt in the bowl of a standing mixer (or a large bowl if kneading by hand). Create a well, and pour in the eggs, yeast, warm milk, melted butter, vanilla, and rum. Add the orange zest. Stir with a wooden spoon until just combined, then place in the mixer with the dough hook attached and knead. Slowly add the remaining two cups of flour. Knead for 10 minutes. If kneading by hand, this will take about 30 minutes.
  4. If using dried fruit or chocolate chunks, add them to the mixer at this point and knead until combined.
  5. Divide dough into three and place in separate greased bowls. Cover with plastic wrap let rise for an hour until doubled in bulk (or overnight in the fridge).
  6. Punch down the dough. If using a filling like the poppy seed paste or a chocolate spread, roll the dough out into a rectangle, spread the filling over the dough, then roll the dough tightly like a jelly roll.
  7. Place dough in a loaf pan, baking sheet or bundt pan. Cover, and let rise for 30 minutes.
  8. Preheat the oven to 350.
  9. Bake the babka for 15-20 minutes, then lower the heat to 325 and bake for another 15 to 20. Note, if using a loaf pan it may take a few extra minutes. When done, the bread will sound hollow if tapped.
Enjoy!

Nutella Scones

February 5th is World Nutella Day. I may or may not have already mentioned this, but I looooove Nutella. I know it isn’t actually healthy, despite what the commercials say, but it is so delicious. Chocolate and hazelnut are just a match made in heaven.

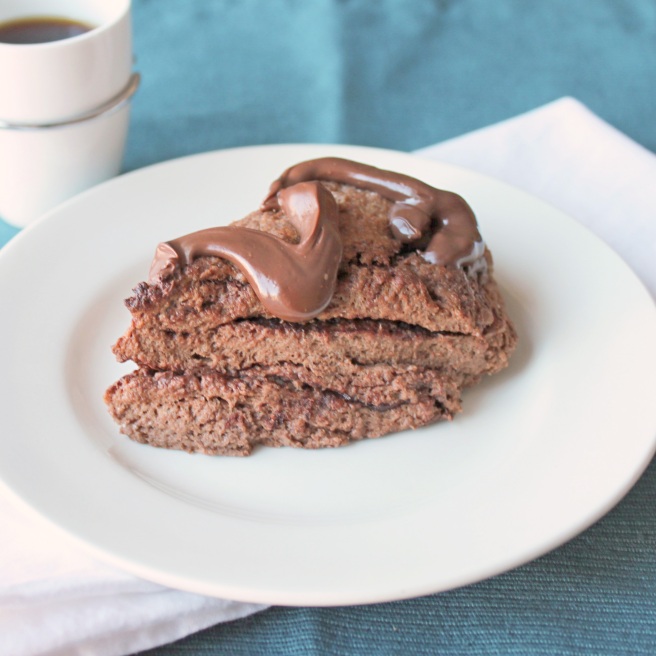
I think my favourite way to eat Nutella is slathered in a thick layer on toasted white bread. I’ve only started baking with Nutella recently. My first attempt at it was my Chocolate Nutella Bites. That was followed quickly by Abby Dodge’s Nutella Fudge Brownies. To celebrate Nutella Day, I decided to try these Nutella Scones from Baked Explorations. I’ve been eying the book since it came out, and based on how well these guys came out I think I have no choice but to buy it. The scones are incredibly addictive, I love the layers of Nutella baked between chocolate scone. If you don’t have plans for Nutella Day, make these.

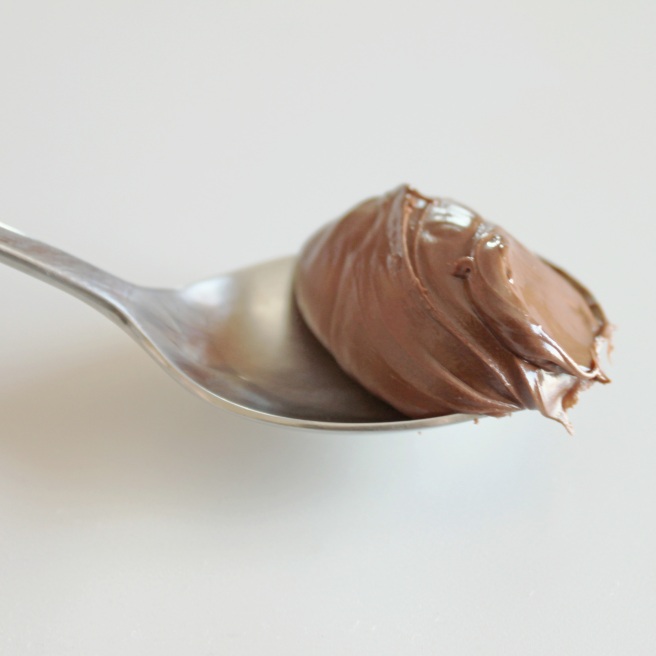
Or you could celebrate with a nice big spoonful.

Nutella Scones

  • 2 cups unbleached all-purpose flour
  • 1/4 cup granulated sugar
  • 1/4 cup dark sweetened cocoa powder (like Valrhona)
  • 1 tablespoon baking powder
  • 1/2 teaspoon salt
  • 6 tablespoons (3/4 stick) cold unsalted butter, cut into chunks
  • 1 large egg
  • 1/2 cup heavy cream
  • 3/4 cup toasted hazelnuts,coarsely chopped
  • 1/2 cup Nutella
  1. Preheat oven to 375. Line a baking sheet with parchment or a silicon mat.
  2. In a large bowl, whisk together the flour, cocoa*, sugar, baking powder, and salt. Add the butter* to the flour. Using your fingertips, rub the butter into the flour until the chunks of butter become pea sized and the flour holds together when squeezed.
  3. Whisk the cream and egg together. While mixing, slowly pour the cream mixture into the flour mixture until the dough just comes together. Stir in the hazelnuts*, then pour the dough onto a floured surface. Knead the dough into a 6 inch by 12 inch rectangle (doesn’t have to be exact).
  4. Spread 1/4 cup of the Nutella over the dough, then roll it into a cylinder. Flatten the cylinder into a disk, then slice it into wedges (6 or 8).
  5. Bake for 18 to 20 minutes.
  6. Once baked, place on a cooling rack. Warm the remaining 1/4 cup Nutella, then drizzle it over the cooling scones.

*Notes and tips

The recipe calls for sweetened cocoa, I used unsweetened and found them to be sweet enough.

For scones, cold butter is best. To get it into cubes, cut it while it’s slightly softened then put it in the freezer for a few minutes.

I omitted the hazelnuts because I didn’t have any on hand. They would probably add a really nice crunch, but I didn’t really miss them.

Enjoy!