Peanut Butter Chocolate Chip Sandwich Cookies

peanut butter chocolate chip cookies

While watching a recent episode of Criminal Minds I learned that people identify most with the music they listened at the age of 14. I guess that explains why I know the lyrics to so many Ace of Base songs. And why I think Meatloafs I Would Do Anything For Love (But I Won’t Do That) is one of the greatest car singing songs of all time. 1994 was a good year in music. Remember this classic? (please note the Habs jersey in the video)

peanut butter chocolate chip cookies

Despite some awfully cheesy songs , I really do identify with the music from that year. I spent hours listening to The Cranberries, Melissa Ethridge. I think I had that Lisa Loeb song on repeat for a good 6 months (taped off the radio of course, with the inevitable announcer’s voice cutting into the song). And I’m still looking for a man like the one Salt-n-Pepa kept singing about.

peanutbutterlove

This all got me thinking about the types of food I identify with and when those connections were made. My taste in food, like my taste in music, has changed over the years. Some foods I’ll always love though, and those loves were forged way before my 14th birthday. Grilled cheese sandwiches, my moms pancake soup, stuffed vine leaves (random, I know).

Cookies and Milk

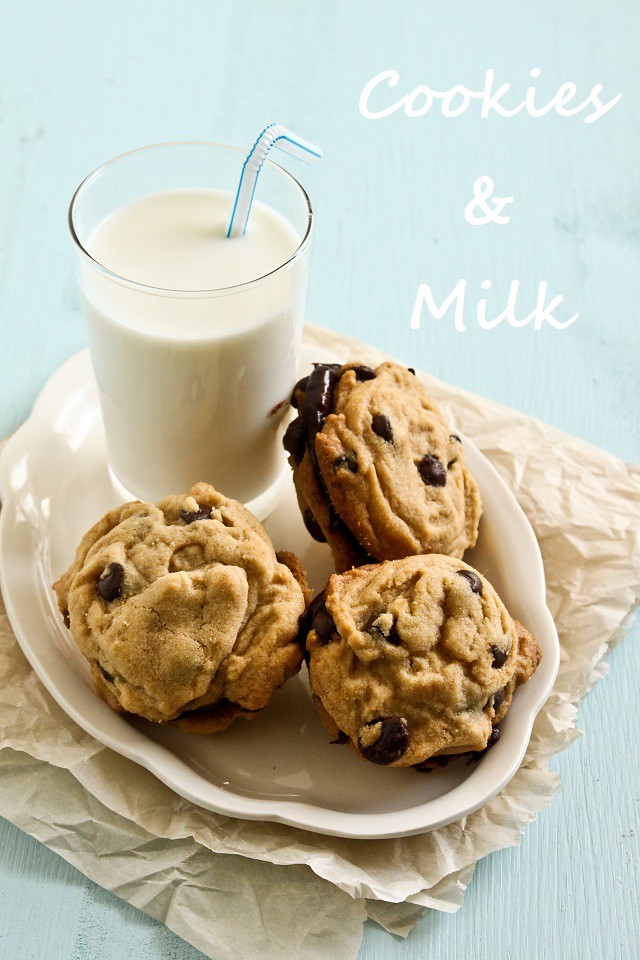
And, of course, cookies. As a kid I would have told you that the classic chocolate chip cookie could not be beat, but I would have been wrong. All you need to take chocolate chip cookies to the next level is a little peanut butter, another childhood favourite. If you want to make them out of this world, just sandwich some chocolate and peanut butter filling between two cookies. I made these for the Super Bowl under the guise of “go big or go home”, and they did not disappoint. The cookies should be a little chewy, so be careful not to over bake them or they’ll get too crisp. The recipe makes about 36 cookies, or 18 sandwiches. Recipe adapted from Bon Appetit.

Chocolate Hazelnut Snowballs

Snowball Cookies

Tonight, I was crucial to the success of a rescue operation.

It has been bitterly cold in Montreal this week, with today’s high around minus 15 degrees. My plan was to avoid the cold by sitting at home by the fire and napping/watching TV all day. Midway through Jeopardy the call came; my brother needed help. He had parked his car outside a metro all day and it wouldn’t start. Normally I would let my dad handle this type of situation, but this time it was decided we both would go. We donned our snow gear, grabbed the jumper cables and headed out.

When we arrived at the scene my brother looked half frozen, but he refused to put on a hat. The plan was to push my brothers car out of it’s parking space so that we could boost it. The men attempted to push the car while I got the cables.

But the car wasn’t moving.

So I headed over to help. And with my measly little pipe-cleaner arms I succeeded in getting the car moving.

I don’t know what they would have done without me. We got the car out of the spot, boosted it and everyone headed home, safe and sound.

Snowball cookies

Once home, I felt it was time to reward myself with a hot chocolate and a couple of these Chocolate Hazelnut Snowball cookies.The recipe was adapted from this one in the December Food and Wine. These were the last of the Christmas cookies I made this year. The texture is kind of similar to biscotti, a great cookie to have with a cup of tea or coffee.    I used hazelnuts instead the pecans called for in the recipe because of an allergy. I also cut the quantity of nuts used by half a cup, because I felt that the hazelnuts would overwhelm the cookie.

Chocolate-Hazelnut Snowballs

Makes 30-36 cookies

  • 1 1/2 cups hazelnuts, finely chopped
  • 1 cup unsalted butter, softened
  • 1/2 cup sugar
  • 2 tsp vanilla extract
  • 1 3/4 cups flour
  • 1/4 cup cocoa powder
  • 2 tsp instant espresso powder
  • 1/2 tsp salt
  • Icing sugar for coating
  1. Preheat the oven to 400 degrees F. Spread the hazelnuts on a baking sheet and roast them for 5 to 10 minutes until lightly toasted.
  2. In a large bowl, beat the butter, sugar and vanilla together until smooth.
  3. In a separate bowl, mix the flour, cocoa powder, espresso powder and salt together. Stir the flour into the butter mixture until well combined. Stir in the hazelnuts. Cover the dough in plastic wrap and chill for 1 hour.
  4. Preheat the oven to 325 degrees F. Roll the dough in to tablespoon sized balls and place on a lightly greased baking sheet. Bake for 15 to 18 minutes. The cookies will be slightly firm to the touch when done. Let cool for 10 minutes on the baking sheet, then cool completely on a rack.

Enjoy!

Earl Grey Tea Cookies, Take Two

First of all, I’d like to thank everyone who left a comment on my last post. My family has gone through a tough time lately, and although I’d prefer not to get into the details here, the virtual hugs are very much appreciated.

Secondly, I’d like to apologize to all my subscribers and followers for hitting “publish” instead of “preview” earlier today. This was the second time I’ve made that mistake, and I’m hoping I’ll never do it again. I hope having a broken link in your reader wasn’t too much of an annoyance.

Now onto the cookies. I was heading to a friends for coffee this weekend and didn’t want to show up empty handed. Cookies were the obvious choice; they’re quick, easy, and very transportable. I had a lot ideas about what to make but, as my mom pointed out, few ingredients. I took a look in the pantry and spotted a few containers of Mighty Leaf Tea. Tea in a cookie is something I’ve been meaning to try for awhile. I did a quick Google search and found a Martha Stewart recipe that sounded perfect. Then I had to make a tough decision; should I make the cookies as written, or should I make them with Jasmine Green Tea? In the end I chose to make them as written, but I will definitely be trying them with the green tea as well.

The cookies were perfectly crisp and very lightly flavoured with Earl Grey. Next time I make them I think I’ll omit the orange zest, because although Earl Grey is a citrus based tea, it’s flavour is too light to stand up to the orange. Despite that I really enjoyed these cookies, and I think I’ll be adding them to the Christmas baking rotation. I think they’d make a great gift along with some fancy teas.

Earl Grey Tea Cookies

Makes about 60 cookies

  • 2 cups all purpose flour
  • 2 tbsp finely ground tea (tea can be ground in a spice grinder or mini food processor, use the best quality you can afford as cheaper teas have less flavour)
  • 1/2 tsp salt
  • 1 cup unsalted butter, softened
  • 1/2 cup powdered sugar
  • 1 tbsp finely grated orange zest (optional)
  1. In a small bowl mix the flour, tea and salt together. Set aside.
  2. In a large bowl, beat the butter, powdered sugar and orange zest together with an electric mixer until the butter is light and fluffy (about 3 minutes). Add the flour, mixing until well combined.
  3. Split the dough in half and create two round logs, 1 1/4 inches in diameter, wrap them with parchment paper and refrigerate for 1 hour. To keep the bottoms of the logs from flattening out you can slide the logs into paper towel tubes before refrigerating.
  4. Preheat the oven to 350. Line two cookie sheets with parchment, set aside.
  5. Cut the logs into 1/4 inch slices, place the slices on the baking sheets about 1 inch apart. Bake for 13 to 16 minutes until the bottoms are just golden. Let the cookies cool on a wire rack before serving.

Enjoy!

Apple Cinnamon Cookies with Brown Butter Icing

When tragedy strikes we feel the need to do something, anything, to make it better. Sometimes there are no actions that can be taken. All we can do is be there to comfort each other. The only thing that can make things better is time.

Comfort can come in many forms; kind words, a hug, or even a cookie (or two) with a tall glass of milk. These cookies were adapted from Martha Stewart’s Pumpkin cookies. I substituted unsweetened apple sauce for the pumpkin puree. Since apple sauce is much thinner than pumpkin puree, I strained the sauce with a coffee filter to get a thicker consistency. You could also try cooking the sauce down.

The cookies have a very cake like texture. The apple flavour came through very well, and was wonderfully complemented by the brown butter icing. One note on the icing, make sure to whip it well otherwise the butter will separate.

Apple Cinnamon Cookies with Brown Butter Icing

Makes approx. 48 cookies

  • 2 3/4 cups all purpose flour
  • 1 tsp baking powder
  • 1 tsp baking soda
  • 1 tsp salt
  • 1 1/2 tsp cinnamon
  • 1 1/4 tsp ginger
  • 3/4 tsp nutmeg
  • 3/4 cup unsalted butter, softened
  • 1 1/2 cup packed brown sugar
  • 1/2 cup granulated sugar
  • 2 large eggs
  • 1 1/2 cups unsweetened apple sauce, strained
  • 3/4 cup evaporated milk
  • 1 tsp vanilla extract
  1. Preheat the oven to 375 F. Line two baking sheets with parchment. Set aside.
  2. In a medium bowl, whisk the flour, baking powder, baking soda, salt, and spices together. Set aside.
  3. In a large bowl, beat the butter and sugars together until light and fluffy (about 3 minutes with an electric mixer). Mix in the eggs, followed by the apple sauce, evaporated milk, and vanilla. Add the flour, mixing till well combined. The batter will be quite thin.
  4. Spoon the dough onto the prepared baking sheets, making cookies approximately 1 inch rounds, spaced 1 inch apart.
  5. Bake for 12 to 15 minutes, until the bottoms are lightly browned and the tops spring back when pressed. Let cool completely on a wire rack before icing.

Brown Butter Icing

  • 4 cups powdered sugar, sifted
  • 10 tbsp unsalted butter
  • 1/4 cup evaporated milk
  • 2 tsp vanilla
  1. Put the powdered sugar in a mixing bowl, set aside.
  2. In a medium saucepan melt the butter over medium heat. Cook, stirring occasionally until the butter becomes golden brown and smells nutty. Pour the melted butter over the powdered sugar, making sure to scrape the brown butter bits in as well. Add the evaporated milk and vanilla. Beat with an electric mixer until smooth. Use to ice cooled cookies.

Enjoy!

Oatmeal Cherry Cookies

Oatmeal Cherry Cookies

I discovered something this weekend, something I probably should have known. It turns out I can no longer stay out till 4 AM without suffering any consequences.

I was out for my friend Steph’s bachelorette party. I had a great time, and I hope she enjoyed her “last night of freedom”.

Unfortunately, even though I didn’t have much to drink, I was completely exhausted the next day. I had a busy day planned to so forced myself to get up early. The people at Eat In Eat Out Magazine have been kind enough to include I’ll Have What She’s Having in their Holiday edition. I need to submit two holiday recipes to them, so I planned to make at least one dish last weekend. But I was tired and cranky and really not in the mood for a holiday style dish.

I wanted something easy and comforting. I wanted a cookie. And a glass of milk.

So that’s what I made. A simple oatmeal cookie, the kind of cookie that brings back memories of childhood and makes everything better. These cookies are crispy on the outside with a chewy center. The sour cherries are a great contrast to the sweet cookie, and the cardamom adds a touch of warmth.  I had them with a glass of milk, and then I took a nice long nap.

Oatmeal Cherry Cookies

Oatmeal Cherry Cookies

  • 1 1/2 cups rolled oats
  • 1/2 cup all purpose flour
  • 1/2 cup dried sour cherries
  • 1/2 tsp baking soda
  • 1/2 tsp salt
  • 1/2 tsp cardamom
  • 6 tbsp butter
  • 1/2 cup packed brown sugar
  • 1/4 cup granulated sugar
  • 1 egg
  • 1 tsp vanilla extract
  1. Preheat the oven to 350 F
  2. In a medium bowl, stir the oats, flour, cherries, baking soda, salt and cardamom together. In a separate bowl, beat the butter and sugars together with an electric mixer until light and fluffy. Beat in the egg, followed by the vanilla. With a wooden spoon, stir in the flour mixture until well combined.
  3. Line 2 baking sheets with parchment paper. Using about a tablespoon of dough per cookie, and drop them two inches apart on the baking sheets. Bake for 12 to 16 minutes. Let cool on the baking sheets for 5 minutes then transfer to a wire rack to cool completely.
Enjoy!

Almond and Sour Cherry Biscotti

Biscotti with almonds and dried sour cherries

Last week I did something I hardly ever do.

I read. And not just 140 characters at a time. I read an actual book. From cover to cover.

I love to read, but somehow rarely take the time to sit down with a good book. The interweb pulls me in and sucks up all my time.

But while on vacation there’s always time for a good book. Last week I got caught up in the lives of the members of the Guernsey Literary and Potato Peel Pie Society. The book takes place just after the second World War. Told entirely through letters, it tells the story of a group of people who survived occupation by the Germans on the British island of Guernsey. The literary society is created in a moment of panic. To make the lie the truth, the characters start meeting regularly to discuss literature. In doing so they discover a love of reading that helps them get through those difficult years. Although the topic is a very heavy one, the book is lighthearted and easy to read. I was skeptical about the format, but found that the characters came alive through their letters to each other. How can you not love a group of people who insist there be pie when all there is to eat is potato?

I got completely lost in the book and finished it in a day. It reminded me why I love reading so much, and so I’ve made a promise to myself to not always let the interweb grab my attention. I will curl up with a coffee and a good book more often. And maybe nibble on a few Almond and Sour Cherry Biscotti while I’m at it.

Biscotti with almonds and dried sour cherries, with a hot cup of coffee

Before I give you the recipe I need to write a disclaimer. Although the biscotti were delicious, some of them broke as I sliced them. I think my almond pieces were too big. My suggestion is to make sure there are no large chunks or use an electric knife to slice the cookies.

Almond and Sour Cherry Biscotti

Modified from Food and Wine

  • 2 cups all-purpose flour
  • 1 tsp baking powder
  • 1/4 tsp baking soda
  • 1/4 tsp salt
  • 1/2 cup butter, softened
  • 3/4 cup sugar
  • 2 eggs
  • 1/2 tsp almond extract
  • 1/2 cup almonds, chopped
  • 1/2 cup dried sour cherries
  1. Preheat the oven to 325 F
  2. In a small bowl, whisk together the flour, baking powder, baking soda and salt. Set aside.
  3. In a medium bowl cream the butter and sugar together with an electric mixer. Beat in the eggs, one at a time, followed by the almond extract. Add the dry ingredients then mix on low speed until well combined. With a wooden spoon stir in the almonds and sour cherries.
  4. Grease a baking sheet, then turn the dough out onto. Shape the dough into a log, about three inches wide 6 inches long. Bake for 30 to 35 minutes until golden. Place the cookie sheet on a rack to cool for 5 minutes, then cut 1/2 to 1 inch thick slices with a serrated or electric knife. Bake the slices for 7 minutes on each side.
  5. Let cool completely before serving.
Enjoy!

Guest Post: For The Love of Cookies!

In my last post I mentioned that I’m looking for people to guest post, as I’ve been incredibly busy lately. I didn’t really think anyone would volunteer, but I underestimated the kindness of food bloggers. Almost immediately Marnely of Cooking With Books sent me a message offering to help.

Marnely is a blogger I discovered through the magic of Twitter (follow her @nella22). I’ve only just recently “met” her, but can already tell that she is a kind, generous and fun person. You can see from her blog and her choice of career that she is also very passionate about food and has lots to share. I hope you enjoy her guest post as much as I did!

For the Love of Cookies!

Marnely of Cooking with Books

 I’d love to say I have great memories of my Cookies, Tarts and Mignardises class at the CIA. Baking cookies all day and taking boxes to share with roommates, what was not to love? I’ll tell you what: the homework! We were sent every day with a tray of labeled cookies to taste test. About 20 cookies a day, for the first week of the class, that’s 100 cookies in a week. You might be thinking, oh I wish I had that homework! No darling readers, you don’t. It gets old, FAST.

Day One, you were excited, “Oh cookies! Yum!” and wouldn’t even share with your roommate.
Day Two was, “Oh…cookies. Ok, let’s get this over with!”
Day Three, “Hey Roommate, you want to taste these cookies and tell me your thoughts?”
Day 3 and 4, the roommate (a cook, not a baker) would eat your cookies and help.
Day 5, you did the unthinkable. Remember wine tasting and spit buckets? Yeah, I’ll spare you the details.
That my friends, is the life of a baking and pastry student in culinary school. On Pie day in Baking Techniques, we took home 8 pies each. Good thing the CIA is visited by more than a million tourists a year, so as I walked out of class I handed them pies, cakes, cookie boxes, chocolates and candies. We feared the Freshman 15, which turned out to be more like the Freshman 22 for me.
Well, back to this post for Lynn. I wanted to share a simple but great tea cake recipe. Financiers are commonly confused with pastries but they are actually French cakes typically made in rectangular molds. Their flavor is based on both almond flour and the browned butter in it. Since berry season is approaching, this is a great way to showcase your berries! Serve with whipped cream on the side and enjoy with your afternoon tea or coffee.
Financier

Photo Credit: The Culinary Institute of America
8.2 oz Almond flour
6 oz Sugar
1.5 oz Cornstarch
Pinch Salt
6 oz. Egg whites
2 oz. Honey
5 oz Brown Butter
Raspberries or blueberries, frozen
1.      Melt butter in small sauce pan and continue to heat until the butter reaches a light brown color. Cool.
2.      Combine the almond flour, sugar, cornstarch, and salt in a bowl.
3.      Whisk egg whites gently, only until frothy. Add to dry ingredients and then stir in the honey.
4.      Stream in the brown butter and incorporate.
5.      Pipe into silicone molds and garnish with a berry before baking.
6.      Bake at 375 F, until edges are golden brown.

Egyptian Date Crescents

During our baking marathon last Friday my mom and I also made some cookies, including these Egyptian Date Cookies. We make them every year at Christmas and Easter for my dad. As we shaped these Egyptian cookies, my mom told me stories about what Easter was like when she was growing up in Poland. There was so much cooking and baking to do, the whole family would work for days in advance. Everyone you saw was invited to Easter dinner, and often people you hadn’t seen would just show up, so they had to be prepared for a lot of guests. On Easter Sunday no work was done. Everyone would go to church and then families and friends would all get together to celebrate.

Things are a little different now, as it was just my immediate family at our celebration this year. We still had quite a feast though. First was breakfast made up of Polish sausage and ham, rye bread, hard boiled eggs, and babka. It’s a very Polish meal. Then after a quick visit to the Saint Joseph Oratory on Mount Royal (a beautiful basilica with very challenging steps leading up to it, every time I go I hear the Rocky theme music in my head), we got to work on dinner. Roast lamb, stuffed vines leaves, rice, potatoes, salad. Then came my favourite part, dessert; a light cake and these cookies.

One of the advantages of having my mom around while baking is that I was able to take “how to” pics. Here’s a visual on how to form the crescents:

Egyptian Date Crescents

Makes about 50 cookies

  • 4 cups flour
  • 1 lb butter at room temp, cut into pieces
  • 1 tsp rose water
  • 1/2 cup milk
  • 1 package pressed dates
  • icing sugar for coating
  1. Preheat oven to 400.
  2. Using your hands, combine the butter and flour until it holds together when squeezed and there are no large pieces of butter.
  3. Add the rose water and milk. Stir until well combined. The dough should have a play dough like consistency.
  4. Take about a tablespoon of dough, form it into a ball. Press the center of the ball down, creating dent in the dough. Place a small amount of the pressed dates into the indentation. Close the dough up, then twist into a crescent. (See pictures above)
  5. Bake for 15 minutes, until the bottom of the cookies are just golden.
  6. Let cool completely, then cover in icing sugar.
These cookies will keep in an airtight container for about a week.
Enjoy!

Double Ginger Chocolate Cookies


Last week I went over to a friends house for coffee. As usually happens when two single women get together, the conversation eventually turned to men. You’d think at this point in our lives we could manage a conversation without talking about them, but no. Long story short, we don’t get them.

You go out on a date (well she does, I think 95% of the population is un-datable), things go really well, and then a week goes by and he hasn’t called for a second date. Why? What happened?

We pondered the possibilities while eating these Double Ginger and Chocolate Cookies. Serious injury was ruled out because she saw him at the gym. He smiled and waved, so it wasn’t amnesia. The men in Montreal tend to be short, and this guy is 6’2”. My theory is he knows all the women in the city are fighting over him and the other four tall guys, so he doesn’t want to commit.

After eating several cookies and drinking too much coffee, we came up with an action plan. Call him, ask how his weekend was, and see if he mentions date number two. She put the plan in place  Sunday night. They had a great conversation, but no second date

At least there were cookies.

I’ll be honest, these were a little too gingery for me. Next time I think I’ll just use the ground ginger. I also think they could use some chocolate chips. The recipe isn’t perfect, but I think with a few more tweaks it could be really good.

Double Ginger Chocolate Cookies

Adapted from the January 2011 issue of Bon Appetit

  • 1 3/4 cups all purpose flour
  • 1/4 cup cocoa powder
  • 2 teaspoons baking soda
  • 1 1/2 teaspoons ground ginger
  • 1 teaspoon ground cinnamon
  • 1/4 tsp salt
  • 3/4 cup sugar
  • 3/4 cup butter
  • 1/4 cup mild-flavored (light) molasses
  • 1 large egg
  • 2 teaspoons minced peeled fresh ginger
  1. Preheat oven to 350
  2. In a bowl, mix together the flour, cocoa, baking  soda, salt, ground ginger, ground cinnamon.
  3. In a separate bowl, cream the butter and sugar together until light and fluffy. Mix in the molasses, egg and fresh ginger until well combined.
  4. Mix the dry ingredients into the wet.
  5. Using a tablespoon or small ice cream scoop, drop dough onto a cookie sheet about two inches apart.
  6. Bake for 13-15 minutes.

Enjoy!

Chocolate Pistachio Biscotti

Sometimes I think the only reason I have cable is to watch the Food Network. All weekend long I have the TV on as I do my cooking and cleaning. Ina Garten, Laura Calder and Bobby Flay are like the soundtrack to my weekend.

I’m not a huge fan of competition shows in general but one of my favourite cooking shows is Top Chef, which in Canada airs on Food Network Canada a few weeks after it begins in the United States. I love watching chefs come up with incredible (and sometimes terrible) meals, and seeing their creativity grow each week. I would also love to know the truth about the pea puree. Unfortunately, I got my December issue of Food and Wine before the finale aired in Canada, so despite all my efforts to live in a bubble, I knew who was going to win.

All this to say these cookies are from Food and Wine’s feature of Kevin Sbraga. The cookies all looked delicious, but I decided the first one I had to try was the chocolate biscotti. My dad makes biscotti every Christmas, but I had never made them myself. The batter is just as easy to put together as a sugar cookie. The only real difference is the baking process. First the cookies are baked as a log, the log is then sliced and the pieces are baked again until they dry out.

These biscotti were very tasty. The chocolate and pistachio go together very well, but to be honest with you, I prefer my dads. Just because.

I’ll be submitting these cookies to Cream Puffs In Venice for Magazine Mondays. Magazine Mondays are a weekly event designed to help us get through those stacks of magazine recipes we’ve put aside to make “one day.”

Chocolate Pistachio Biscotti

From the December 2010 issue of Food and Wine

  • 1 stick unsalted butter, softened
  • 3/4 cup sugar
  • 2 large eggs
  • 1 vanilla bean, seeds scraped
  • 1 tablespoon dark rum
  • 2 1/2 cups all-purpose flour
  • 1/2 cup unsweetened cocoa powder
  • 1 teaspoon baking powder
  • 3/4 teaspoon salt
  • 1/2 teaspoon cinnamon
  • 1 1/2 cups raw pistachios
  • 1 large egg white, lightly beaten
  • Melted bittersweet chocolate, for dipping or drizzling
  1. Preheat the oven to 350. Line a baking sheet with parchment or a silpat.
  2. Cream butter and sugar together until light and fluffy. Add the eggs, vanilla, and rum beating until well combined.
  3. In separate bowl stir together the flour, cocoa powder, baking powder and cinnamon.
  4. Mix the dry ingredients into the wet. Beat in the pistachios.
  5. Divide the dough in two, shape each half into a log. Brush the logs with the egg whites. Bake for 25 minutes.
  6. Remove from the oven and let cool slightly. Cut the logs into slices, return to the oven and bake for an additional 20 minutes until the cookies have dried out. Let cool completely. Drizzle with melted chocolate.

Enjoy!