Berry Mascarpone Almond Tart

Berry Mascarpone Tart

I’ll Have What She’s Having turns two years old this week. To be honest, I never really thought I would still be blogging at this point. I’m one of those people who moves from obsession to obsession, leaving past ones behind without much thought or regret. I think what keeps food blogging interesting for me is that it continually challenges me to learn new things. In these two years I’ve learned more about photography than I ever would have without this blog, and there is still so much to learn.
In the coming year I want to challenge myself to expand my culinary skills as well as my photography skills. I want to try new cooking techniques, attempt dishes that are “scary” (chocolate soufflé, I’m looking at you), and experiment with flavours that I normally wouldn’t use. A friend of mine recently told me that she enjoys my “style” of desserts because I tend to make things she wouldn’t normally make. I want to take that even further.

Berry Mascarpone Tart

The biggest thing that keeps me going is the responses I get from readers. Your comments encourage me, inspire me, and push me to make What She’s Having better and better. Thank you.
On the topic of comments, WordPress recently made some changes to their commenting platform. Those of you who try to comment using an email address that is linked to a WordPress or Gravatar account will have to log into your accounts before leaving a comment. This change was in response to some cases of Gravatars being hijacked for trolling. Although I understand that something needed to be done, the response was kind of like using a sledgehammer to fix a splinter. I’ve removed the requirement to leave an email address when commenting so that those of you who do not want to log don’t have to. I’m keeping my fingers crossed that I won’t end up with too much spam.

Berry Mascarpone Tart

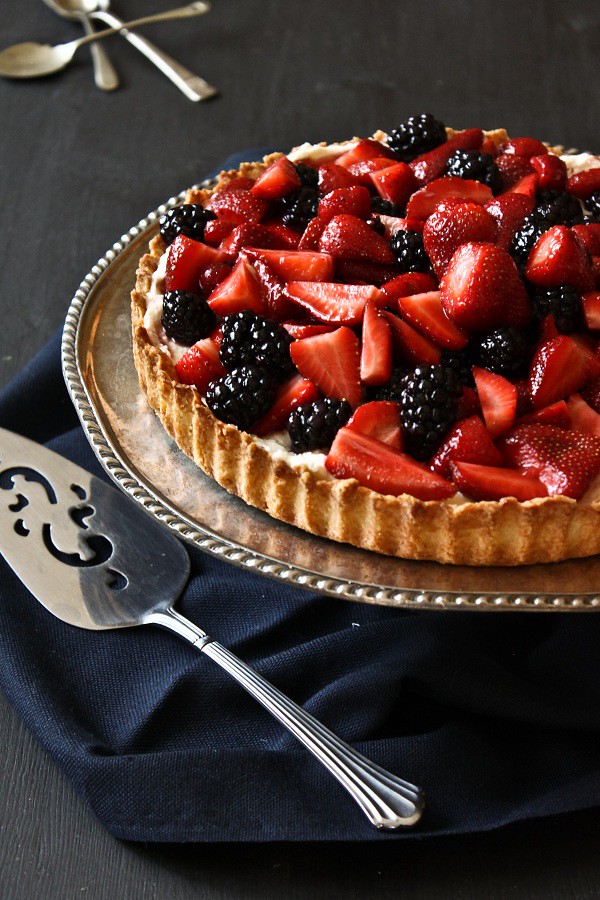
To celebrate my blogaversary, I made this Berry Mascarpone Almond Tart. It’s similar to this one I made last summer except that this time the recipe came together without any drama. The crust has a nice crunch to it from the almonds, and it’s easy to cut through. The filling is similar to a no bake cheesecake filling, creamy and rich. The amaretto flavours works really well with the berries.

Berry Mascarpone Almond Tart
Adapted from Desserts for Breakfast

Pastry Crust

  • 1 cup all-purpose flour
  • ¼ cup almond flour
  • ½ tsp. salt
  • ½ cup unsalted butter, chilled and cut into cubes
  • 1 egg yolk
  • 2-4 tbsp. ice water

Mascarpone Filling

  • 400 grams mascarpone at room temperature
  • 2 tbsp. icing sugar
  • 2 tbsp. amaretto
  • ½ cup whipping cream

Berry Topping

  • 2 cups mixed berries, cleaned
  • 2 tbsp. seedless raspberry jam

1.  Make the pastry crust: In a large bowl mix the flour, almond flour and salt together. Add the butter. Using your finger tips or a pastry cutter, rub the butter into the flour until it forms pea sized pieces of butter and holds together when squeezed. Mix in the egg yolk, and just enough water to bring the dough together. Form the dough into a disk, cover in plastic wrap, and refrigerate for at least 2 hours. Once chilled, roll out the dough to ¼ inch thick and place in a 9 inch tart pan; dock the crust (poke holes with a fork). Refrigerate the crust for 1 hour. Preheat the oven to 400F. Place a sheet of parchment paper on the crust and cover with pie weights or dried beans. Bake for 13-15 minutes, remove the pie weights and parchment and bake for an additional 3-5 minutes. Let cool completely.
2.  Make the filling: In a medium bowl, beat the mascarpone and a tablespoon of the cream together using a hand held mixer until the mascarpone is softened. Beat in the sugar and amaretto. In a separate bowl whip the cream. Fold the whipped cream into the mascarpone. Pour into the chilled tart crust.
3.  Make the berry topping: In a microwave safe bowl heat the jelly until it liquefies (about 30 seconds). Toss the berries with the jelly. Pour over the mascarpone filling. Chill the tart for at least 1 hour before serving.
Enjoy!

Apple Cinnamon Doughnut Muffins


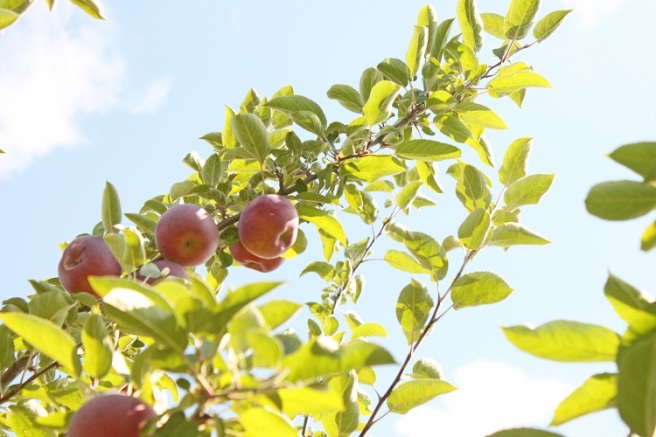
Last weekend I made my annual journey to St-Joseph-du-Lac, one of the apple picking hot spots in Quebec. The weather was incredible, close to 30 C with the humidity and sunny. Not at all the typical apple picking weather I was expecting. Normally the air up north is cool and crisp at this time of year, instead it was hot and sticky.

There were tons of people out there. We even got stuck in apple picking traffic, who knew there was even such a thing? The traffic was frustrating, but we eventually made it out into the orchard.  We repeated last years taste test, and once again decided the Cortland was the way to go. Cortlands were originally bred from McIntosh, but they are firmer and sweeter. They’ll hold their shape in a pie, but you can also make a sauce out of them.

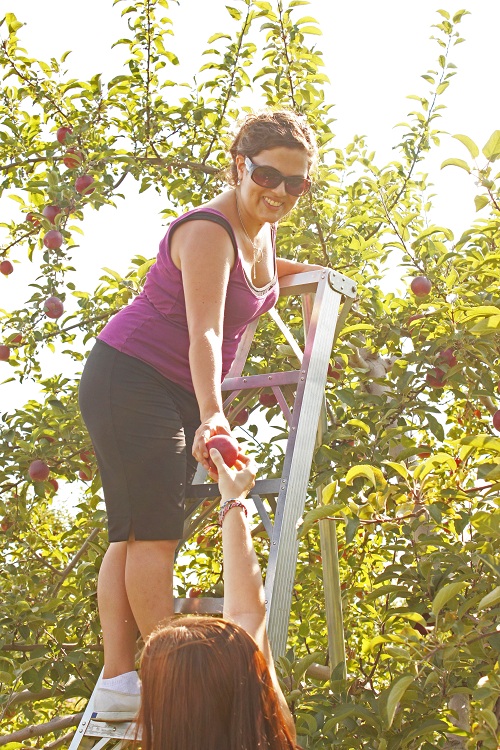
We got our hands on a good ladder and claimed a Cortland tree, then picked 20 lbs for each of us. Hopefully that’ll be enough for all the things I have planned!

When of my favourite things about apple picking is the cider doughnuts. Unfortunately, this years doughnuts were sub par, too greasy, not enough cinnamon sugar. I left the orchard craving  something more, something better. The solution was to make them myself,  but my deep frying experience has yielded mixed results and I didn’t want another disappointment. Instead I decided to make doughnut muffins with an apple cinnamon filling. The nutmeg in the batter and the cinnamon sugar coating completely satisfied my craving. They really do have the texture of a cake doughnut. The fact that they’re dipped in butter probably helps too.

Though these tasted amazing, I have to say that some of them fell apart when I took then out of muffin tin. I think it was my fault for letting the apple filling spread too much in the muffin, it basically created a complete separation between the layers of batter so the muffin top just came off. If you’re going to fill the muffins like I did make sure to make a little well in the batter for the filling.

Another thing you should know is that they are huge muffins. I adapted this from a Fine Cooking recipe, many of the commenters said they made these in mini muffin tins which I think is a great idea if you’re not using a filling.

Apple Cinnamon Doughnut Muffins

(makes 12 muffins)

Filling

  • 1 tbsp butter
  • 4 apples, peeled cored and diced
  • 3 tbsp sugar
  • 1 tsp cinnamon
  • 2 tbsp lemon juice
  • 1 tsp flour
Doughnut Muffins
  • 3/4 cups unsalted butter, at room temperature
  • 3/4 cups sugar
  • 2 eggs
  • 1 tsp vanilla
  • 3 cups flour
  • 2 tsp baking powder
  • 1/4 tsp baking soda
  • 1/4 tsp salt
  • 1/2 tsp ground nutmeg
  • 1/2 cup whole milk
  • 2 tbsp yogurt
Cinnamon Sugar Coating
  • 1/2 cup unsalted butter, melted
  • 3 tsps cinnamon
  • 1 cup sugar
  1. Make the filling: In a medium saucepan melt the butter over medium heat. Add the apples, sugar, cinnamon, and lemon juice. Cook stirring often until the apples are tender and release their juices. Add the flour and stir until the juices thicken. Take off the heat and set aside.
  2. Preheat the oven to 350 F.
  3. Make the muffin batter: In a large bowl cream the butter and sugar together with an electric mixer. Add the eggs one at a time beating till well combined after each addition. Add the vanilla.
  4. In a separate bowl mix the flour, baking powder, baking soda, salt and nutmeg together. Add the flour into the butter mixture in thirds, alternating with the milk and yogurt (you should start and finish with the flour).
  5. Grease a muffin tin. Scoop half the batter into the muffin tin, make a little well in each muffin and fill each with a tablespoon of the apple filling. Top with the remaining batter.
  6. Bake for 30 to 35 minutes until golden and firm to the touch. Let cool completely.
  7. Mix the sugar and cinnamon together for the topping. Dip the tops of the muffins into the melted butter then dip them into the sugar to coat.
Enjoy!


Raspberry Charlotte

This weekend we celebrated my dad’s birthday. When I asked him what he wanted, he said it didn’t matter. Birthday’s aren’t important to him because growing up they were never celebrated. To me that’s all the more reason to want to celebrate now. At the very least, a birthday needs a cake.

I was eventually able to get a request for cake with pudding out of him. I had originally planned to make a chocolate pudding tart, but when my mom came home with raspberries those plans changed to a Charlotte. Charlotte’s are molded cakes filled with mousse or custard and surrounded by cake or lady fingers. They are relatively easy to make and look very impressive.

I say relatively because I had a really, really hard time getting the Lady Fingers to stand up. I read several recipes from blogs, cook books, magazines, they all gave the same instruction: stand the lady fingers around the mold. None of them explained how to get them to stand. In the end I cut them in half to give them flat bottoms, making them more balanced.

I filled the Charlotte with a layer of Grand Marnier flavoured pastry cream and another of whipped cream, then topped the whipped cream with raspberries. To tie the flavours together I dipped the Lady Fingers in a Grand Marnier simple syrup. The result was creamy and decadent; the raspberries added the perfect touch of freshness.

Raspberry Charlotte

  • 3 egg yolks
  • 1/2 cup granulated sugar (divided)
  • 2 tbsp flour
  • 2 tbsp cornstarch
  • 1 1/4 cup whole milk
  • 1 tsp vanilla
  • 3 tbsp Grand Marnier (divide)
  • 1 package store bought Lady Fingers (or home made)
  • 250 ml whipping cream
  • 2 tbsp icing sugar
  • 1 pint raspberries
  1. Make the pastry cream: In a heat-proof bowl whisk the egg yolks with 1/4 cup granulated sugar. Whisk in the flour and cornstarch, the mixture should look like a paste. Set aside. Heat the milk and vanilla in a medium sauce pan. Heat till just before boiling (there will be some small bubbles popping up). Pour a small amount of the hot milk into the egg mixture and whisk to combine (this will temper the eggs). Pour in the remaining milk, whisking constantly. Return the custard to the saucepan, turn the heat to medium and whisk constantly until thickened. Stir in 1 tbsp Grand Marnier. Pour into a clean bowl, cover with plastic wrap then set aside to cool.
  2. Place the Lady Fingers: In a small sauce pan, heat 1/2 cup water with 1/4 cup sugar and 2 tbsp Grand Marnier. Let cool slightly. While cooling cut some the Lady Fingers in half, you will need enough to line the inside of a 9 inch springform pan. Lightly dip one Lady Finger in the simple syrup, then stand it up in the closed springform pan; the flat bottom of the cut Lady Finger should help it stand. Repeat until the entire rim is lined, then fill the base with dipped Lady Fingers. Pour the pastry cream into the springform pan. Refrigerate until set (about an hour).
  3. Once set whip the cream with the icing sugar. Spread on the pastry cream, then top with the raspberries. Refrigerate until ready to serve, then remove the springform mold.
Enjoy!

Grape and Rosemary Cake

Another of summer treasures has arrived in Quebec over the last couple of weeks: Concord Grapes. Concord Grapes are a little smaller than the standard varieties, and I find them to be much sweeter. Their season only lasts a couple of weeks and they’re really easy to miss. I bought a small box and started munching on them right away.

As I was stuffing my face with grapes I wondered how else I could use them. Then I remembered this month’s Bake Together. Abby Dodge has asked us to bake a simple fruit cake our way. Concord Grapes were clearly how I wanted to go. I struggled with how to flavour the cake for awhile. I considered following Abby’s original instructions, or maybe some cardamom. Then Janice suggested rosemary, which sounded perfect. I didn’t want an overwhelming rosemary flavour so I used Janice’s infused honey method from her Lavender Honey Cakelettes.

Grape and Rosemary Cake

  • 1 1/3 cups all purpose flour
  • 1 teaspoon baking powder
  • 1/4 teaspoon baking soda
  • 1/4 teaspoon table salt
  • 6 tablespoons clarified butter
  • 1/2 cup granulated sugar
  • 2 tbsp rosemary infused honey
  • 2 large eggs
  • 1 teaspoon pure vanilla extract
  • 3/4 cup sour cream
  • 1 pint Concord Grapes
  • 1 tbsp sugar
  • 1 tbsp flour
  1. Preheat the oven to 350. Line a 9 in round pan with parchment paper, leaving enough overhang to pull the cake out of the pan once done.
  2. In a bowl, whisk together the flour, baking powder, baking soda and salt.
  3. In a separate bowl, beat the butter and sugar together with an electric mixer. Mix in the honey. Add the eggs one at a time, followed by the vanilla.
  4. Mix in the dry ingredients alternating with the sour cream.
  5. Pour the batter into the prepared pan. Bake for 15 minutes. During this time prepare the fruit, toss the grapes with 1 tbsp sugar and 1 tbsp flour. Once the 15 minutes are done pour the fruit on top of the cake (you’ll have to work quickly). Bake for and additional 25 to 30 minutes.
  6. Serve with a drizzle of rosemary honey.
Enjoy!

Double Ginger Chocolate Cookies


Last week I went over to a friends house for coffee. As usually happens when two single women get together, the conversation eventually turned to men. You’d think at this point in our lives we could manage a conversation without talking about them, but no. Long story short, we don’t get them.

You go out on a date (well she does, I think 95% of the population is un-datable), things go really well, and then a week goes by and he hasn’t called for a second date. Why? What happened?

We pondered the possibilities while eating these Double Ginger and Chocolate Cookies. Serious injury was ruled out because she saw him at the gym. He smiled and waved, so it wasn’t amnesia. The men in Montreal tend to be short, and this guy is 6’2”. My theory is he knows all the women in the city are fighting over him and the other four tall guys, so he doesn’t want to commit.

After eating several cookies and drinking too much coffee, we came up with an action plan. Call him, ask how his weekend was, and see if he mentions date number two. She put the plan in place  Sunday night. They had a great conversation, but no second date

At least there were cookies.

I’ll be honest, these were a little too gingery for me. Next time I think I’ll just use the ground ginger. I also think they could use some chocolate chips. The recipe isn’t perfect, but I think with a few more tweaks it could be really good.

Double Ginger Chocolate Cookies

Adapted from the January 2011 issue of Bon Appetit

  • 1 3/4 cups all purpose flour
  • 1/4 cup cocoa powder
  • 2 teaspoons baking soda
  • 1 1/2 teaspoons ground ginger
  • 1 teaspoon ground cinnamon
  • 1/4 tsp salt
  • 3/4 cup sugar
  • 3/4 cup butter
  • 1/4 cup mild-flavored (light) molasses
  • 1 large egg
  • 2 teaspoons minced peeled fresh ginger
  1. Preheat oven to 350
  2. In a bowl, mix together the flour, cocoa, baking  soda, salt, ground ginger, ground cinnamon.
  3. In a separate bowl, cream the butter and sugar together until light and fluffy. Mix in the molasses, egg and fresh ginger until well combined.
  4. Mix the dry ingredients into the wet.
  5. Using a tablespoon or small ice cream scoop, drop dough onto a cookie sheet about two inches apart.
  6. Bake for 13-15 minutes.

Enjoy!

Nutella Brownies

I made it 13 hours into 2011 before breaking my new years resolution. And then I had breakfast.

I had resolved to cut back on the sweets. I’m going with the “it’s not my fault” excuse. There were a ton of desserts at our New Years celebration. My cousin picked up an enormous Gateau St. Honoré for my birthday and refused to let me leave without taking the leftovers home with me. A Gateau St Honoré is basically a giant cream puff. This one was filled with pastry cream, chocolate pastry cream, whipped cream, and even had some pieces of chocolate cake in it. I couldn’t let it go to waste.  So I had a piece for breakfast. And another later in the day for dessert.

So my New Years resolution starts.. Now!

My contribution to the New Years celebration were Abby Dodge’s Nutella Brownies. If you read a reasonable number of food blogs, you’ve probably come across these already. A few months ago I saw post after post about how incredible these are. The reviews were right, these are awesome. I don’t know why I waited so long to make them.

They are also incredibly easy to make.  If you’re not much of a baker this recipe is a great place to start; there are only 4 ingredients and you don’t need to know any baking techniques.  If you can mix (or have a mixer) you can make these brownies. I found this recipe at Savory Sweet Life.

Nutella Brownies

  • 1/2 cup Nutella
  • 1 egg
  • 5 tbsp flour
  • icing sugar for dusting (you could also top with chopped hazelnuts)
  1. Preheat oven to 350. Grease a mini muffin tin.
  2. In a large bowl mix the Nutella and egg together until smooth.
  3. Add the flour, mix until completely incorporated.
  4. Try not to eat the batter, there is just enough to fill the muffin tins.
  5. Pour batter into mini muffin tin, filling till about 3/4 full.
  6. Bake for 10 to 12 minutes.
  7. Let cool completely, then dust with icing sugar.

Enjoy!

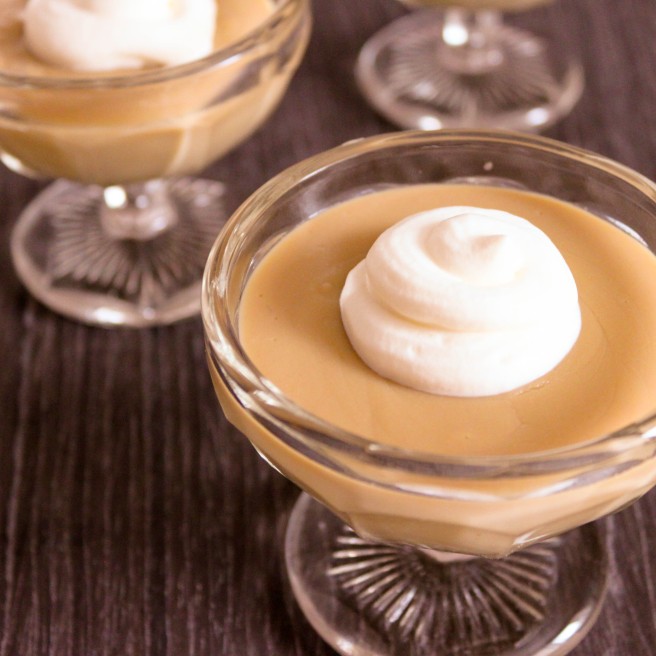
Maple Butterscotch Pudding

I’ve been really behind in my blog reading lately. There are so many posts and so little time!

This week I spent a few evenings catching up on some of my favourite blogs and came across this post by Jamie at My Baking Addiction. I started reading the post because A. I love her blog, and B. I’m obsessed with Cranberry Bliss Bars. But what really caught my attention was the contest. My Baking Addiction and Good Life Eats are giving away Kerry Gold Butter.

Yes, butter. My favourite ingredient. Clearly I had to enter.

All we had to do to enter the contest was post one of our favourite recipes that use butter. I racked my brain for something to post. For some reason everything I thought of had butter in the name, Buttered Rum, Buttered Popcorn, Butter Cookies. And then it hit me, Butterscotch!

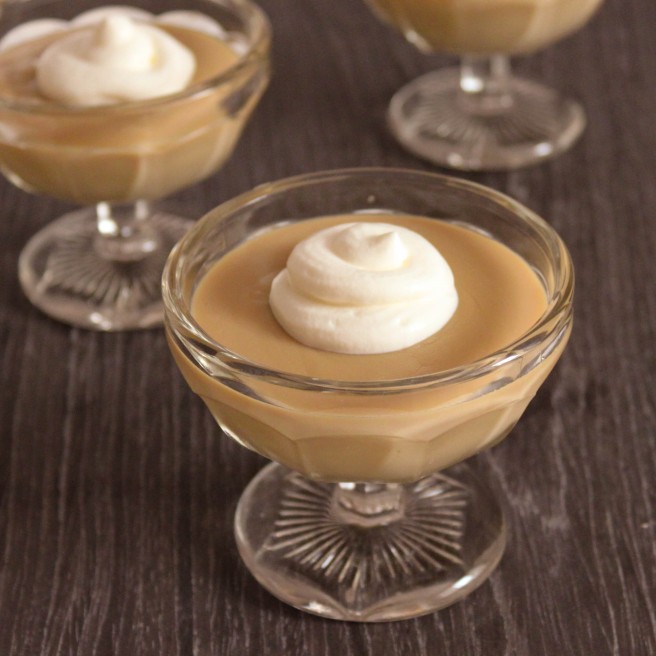
There are a lot of butterscotch recipes out there, all fairly similar. For this recipe I based myself on recipes from David Lebovits and Joy of Baking. I decided to give this recipe a local twist by adding some Gelinotte, a maple liqueur made in Quebec, instead of scotch. Butterscotch does’t actually require alcohol, the name is believed to come from the words butter scorched.

Come join the fun at the My Baking Addiction and Good Life Eats Holiday Recipe Swap sponsored by KerryGold. Voting begins December 19th at 12AM. Please visit either site and vote for your favourite recipe (hopefully mine!)

Maple Butterscotch

  • 4 tablespoons butter, salted or unsalted
  • 3/4 cup packed dark brown sugar
  • 1/4 cup maple syrup
  • 1/2 teaspoon salt
  • 3 tablespoons cornstarch
  • 3 cups whole milk
  • 3 egg yolks
  • 2 teaspoons Gelinotte Maple Liqueur (if unavailable use whiskey or rum, or omit the alcohol)
  • 1 teaspoon vanilla extract
  1. Melt the butter in a medium sized saucepan. Stir in the sugar, maple syrup and salt. Set aside.
  2. In a small bowl mix the cornstarch with 1/4 cup of the milk until the cornstarch is completely dissolved. Whisk in the egg yolks.
  3. Slowly pour the remaining milk into the butter and sugar, whisking constantly. Then add the cornstarch mixture.
  4. Return the saucepan to the heat. Whisk constantly until the mixture starts to boil. Lower the heat and continue to whisk for one minute. The mixture should be quite thick.
  5. Pour into 4 serving bowls and chill for at least four hours.

Enjoy!

Chocolate Truffle Cake

You didn’t think I’d let my Moms birthday go by without a cake, did you?

I usually decide on a type of cake myself, but this time I decided to ask my mom what she wanted. She said chocolate, chocolate mocha. So I got to work looking for the perfect recipe. The perfect recipe turned out not to exist, but I was inspired by two chocolate truffle cake recipes, one from Food and Wine and the other from Anna Olson. I used Anna’s cake recipe so that the cake would have some coffee flavour, and I used the ganache filling from the Food and Wine recipe. I added espresso powder to the dark chocolate layer, and kahlua to one of the white chocolate layers. Unfortunately I don’t think I used enough coffee, the chocolate flavour kind of took over. Despite not being very mocha-ey, the cake was delicious.

Before I get to the recipe, I have a blog award to share. Alina at Russian Season was kind enough to give me the Stylish Blogger Award.

Alina’s site is full of great Eastern European dishes, if you haven’t already you should definitely visit her site. So I’m giving the award right back to her and to these blogs I’ve recently discovered.

All Day I Dream About Food

Amy Bakes Everything

Black Book Kitchen Diaries

Oil and Butter

Wilde In The Kitchen

Pretty Peas


Chocolate Truffle Cake

For the cake

  • 3/4 cup hot brewed coffee
  • 1 1/2 ounces semisweet chocolate, chopped
  • 1 1/2 cups sugar
  • 1 1/4 cups all purpose flour
  • 3/4 cup regular cocoa powder (not Dutch pressed)
  • 1 teaspoon baking soda
  • 1/2 teaspoon baking powder
  • 1/2 teaspoon fine salt
  • 1 large egg
  • 1 large egg white
  • 6 tablespoons vegetable oil
  • 3/4 cup buttermilk
  • 1 teaspoon vanilla

For the Chocolate Ganache

  • 1 1/3 cups plus 2 tablespoons heavy cream
  • 10 ounces bittersweet chocolate, chopped

For the White Chocolate Kahlua Ganache

  • 8 ounces white chocolate, chopped
  • 2/3 cups heavy cream
  • 2 tablespoons unsalted butter
  • 2 tablespoons Kahlua

For the White Chocolate Ganache

  • 8 ounces white chocolate, chopped
  • 2/3 cups heavy cream
  • 2 tablespoons unsalted butter
  1. Make the cake: Preheat the oven to 350 and grease a 15 by 12 inch baking sheet.
  2. In a small bowl, pour the hot coffee over the chocolate. Stir until the chocolate has melted then set aside.
  3. Sift sugar, flour, cocoa, baking powder, baking soda and salt.
  4. In a separate bowl, beat eggs on high-speed for 1 minute. Slowly add the oil, buttermilk and vanilla.
  5. Alternate adding the flour and coffee mixture to the eggs.
  6. Taste the batter, it’s like pudding.
  7. Pour the batter into the prepared pan, bake for 25 to 30 minutes then let cool completely.
  8. Make the chocolate ganache. Heat the cream until small bubbles start to appear. In a small bowl pour over the chocolate and stir until the chocolate has completely melted and is shiny. Chill for 1 hour.
  9. Make the white chocolate Kahlua ganache: Melt the white chocolate over a double boiler. Heat the cream and butter until small bubbles appear then pour into the melted chocolate. Stir until completely combined. Stir in the Kahlua. Chill for 1 hour.
  10. Make the white chocolate ganache: Melt the white chocolate over a double boiler. Heat the cream and butter until small bubbles appear then pour into the melted chocolate. Stir until completely combined. Chill for 1 hour.
  11. Assemble the cake: Slice the cake into 4 equal parts. On the first layer spread the chocolate ganache, reserving some ganache for the top of the cake. Top with another layer of cake. Spread the white chocolate Kahlua ganache on the cake. Top with the third layer of cake, and spread the white chocolate ganache. Top with the final layer of cake and ice with the remaining ganache.
  12. Let the cake set for at least 1 hour. When serving slice with a hot knife.

Enjoy!

Peanut Butter Banana Bread


What did people do with over ripe bananas before banana bread was invented? I always used to make mine with walnuts and chocolate chips. Classic. Delicious. Then a little over a year ago I developed an allergy to walnuts, which means my classic banana bread recipe will make my face swell up into something that looks like this:

I haven’t made banana bread since.

So I need a new banana bread recipe. I could put just chocolate chips, but that seemed too easy. After a quick consultation with Janice, I decided peanuts was the way to go. Unfortunately I forgot to buy the peanuts. Instead I used peanut butter, sort of like a pre-made peanut butter and banana sandwich.

My results were mixed. The flavour was great but the overall experience was lacking. I wanted the peanut butter to swirl through the batter, but the two ended up almost completely combined. I think because of the that the cake was a little dry, sort of like having peanut butter without a glass of milk. I also missed the texture of the nuts in the banana bread. Next time I’ll remember to buy the peanuts.

I’m posting the recipe as I made it, but I’d suggest increasing the amount of mashed banana or yogurt, or maybe even butter. Some experimenting may be required. Or just a large glass of milk.

Peanut Butter Banana Bread

  • 2 cups all-purpose flour
  • 1/2 cup sugar
  • 1 tsp baking soda
  • 1/2 tsp salt
  • 3 ripe bananas, mashed
  • 1/2 cup butter, melted and cooled
  • 2 eggs, lightly beaten
  • 1/3 cup plain yogurt
  • 1/2 cup peanut butter
  1. Preheat the oven to 350 degrees.
  2. Whisk flour, sugar, baking soda and salt together in a large bowl.
  3. In a separate bowl combine the bananas, butter, eggs and yogurt.
  4. Create a well in the dry ingredients and pour the wet into it. Using a rubber spatula, fold the dry ingredients into the wet until just incorporated.
  5. Pour the batter into a greased 8 by 8 inch pan. Dollop the peanut butter randomly over the batter and swirl into the batter using a knife.
  6. Bake for 30 to 35 minutes, until a tester comes out clean.
  7. Let cool before serving.

Enjoy!
PS: If anyone has a fail proof swirling method, I’d love to know what it is!

Magazine Monday – Candied Lemon Slices

I bought an enormous bag of lemons at Costco the other day for a dessert I have planned, but the rest have just been sitting in a bowl waiting for a use. Sometimes when I walk by them I hear them say “eat me”.

So I flipped through a bunch of magazines and found a recipe for candied lemon slices in the March 2005 issue of Martha Stewart Living. Candying a couple of them seemed like a great way to use them. While making this recipe I realized for about the millionth time that I could really use a mandoline. I haven’t bought one yet because they scare me (I’m known for making stupid kitchen moves) but it would really make life a lot easier to have one.  Maybe one day I’ll develop the focus required for using one.

Other than my issues with slicing thinly, this recipe is pretty easy. It takes about an hour and 15 minutes, but most of that time is unattended.

I’ll be submitting this post to Cream Puffs in Venice for Magazine Monday. Magazine Monday’s are a chance to get through all those magazine recipes we have bookmarked to make but never do. Make something, post it, and share it with the rest of us!

Candied Lemon Slices

  • 1 large lemon
  • 1 cup sugar
  1. Prepare an ice water bath.
  2. Using a mandoline or a very sharp knife, slice the lemon very thinly.
  3. Bring 2 cups of water to boil in a saucepan. Add the lemon slices and boil until slightly softened (about 1 minute). Remove lemon slices and put them in the ice water bath.
  4. In a medium sauce pan bring 1 cup of water and the sugar to boil. Place the lemon slices in the sugar-water in one layer and lower the heat to simmer.
  5. Simmer the lemon slices for 1 hour, then place the slices on a baking sheet lined with parchment.